在本地复现syzbot Bugs
本文按照以下文章内容,尝试复现一个syzbot报告的bug。
https://www.linkedin.com/pulse/proof-execution-reproducing-syzbot-bugs-local-kernel-moon-hee-lee-081bc/?trackingId=ueW806vHTCSaYeZf%2Bgzfrg%3D%3D
Step One: Choose a syzbot Report with an Upstream Fix
挑选满足以下三个条件的bug report:
- 有可复现的c reproducer;
- 有配套的bzImage, vmlinux, 和disk.raw ;
- 已经被修复,patch已经被合入上游分支;
https://syzkaller.appspot.com/upstream上罗列了好几千的bugs,但是本文从那些被修复的入手,选择 Fiexed 标签,查看那些已确认、已解决并已关闭的 Bug。为了尽可能贴近当前主线,点一下 Reported 使得列表按报告日期升序排列,优先显示最近的 Bug。
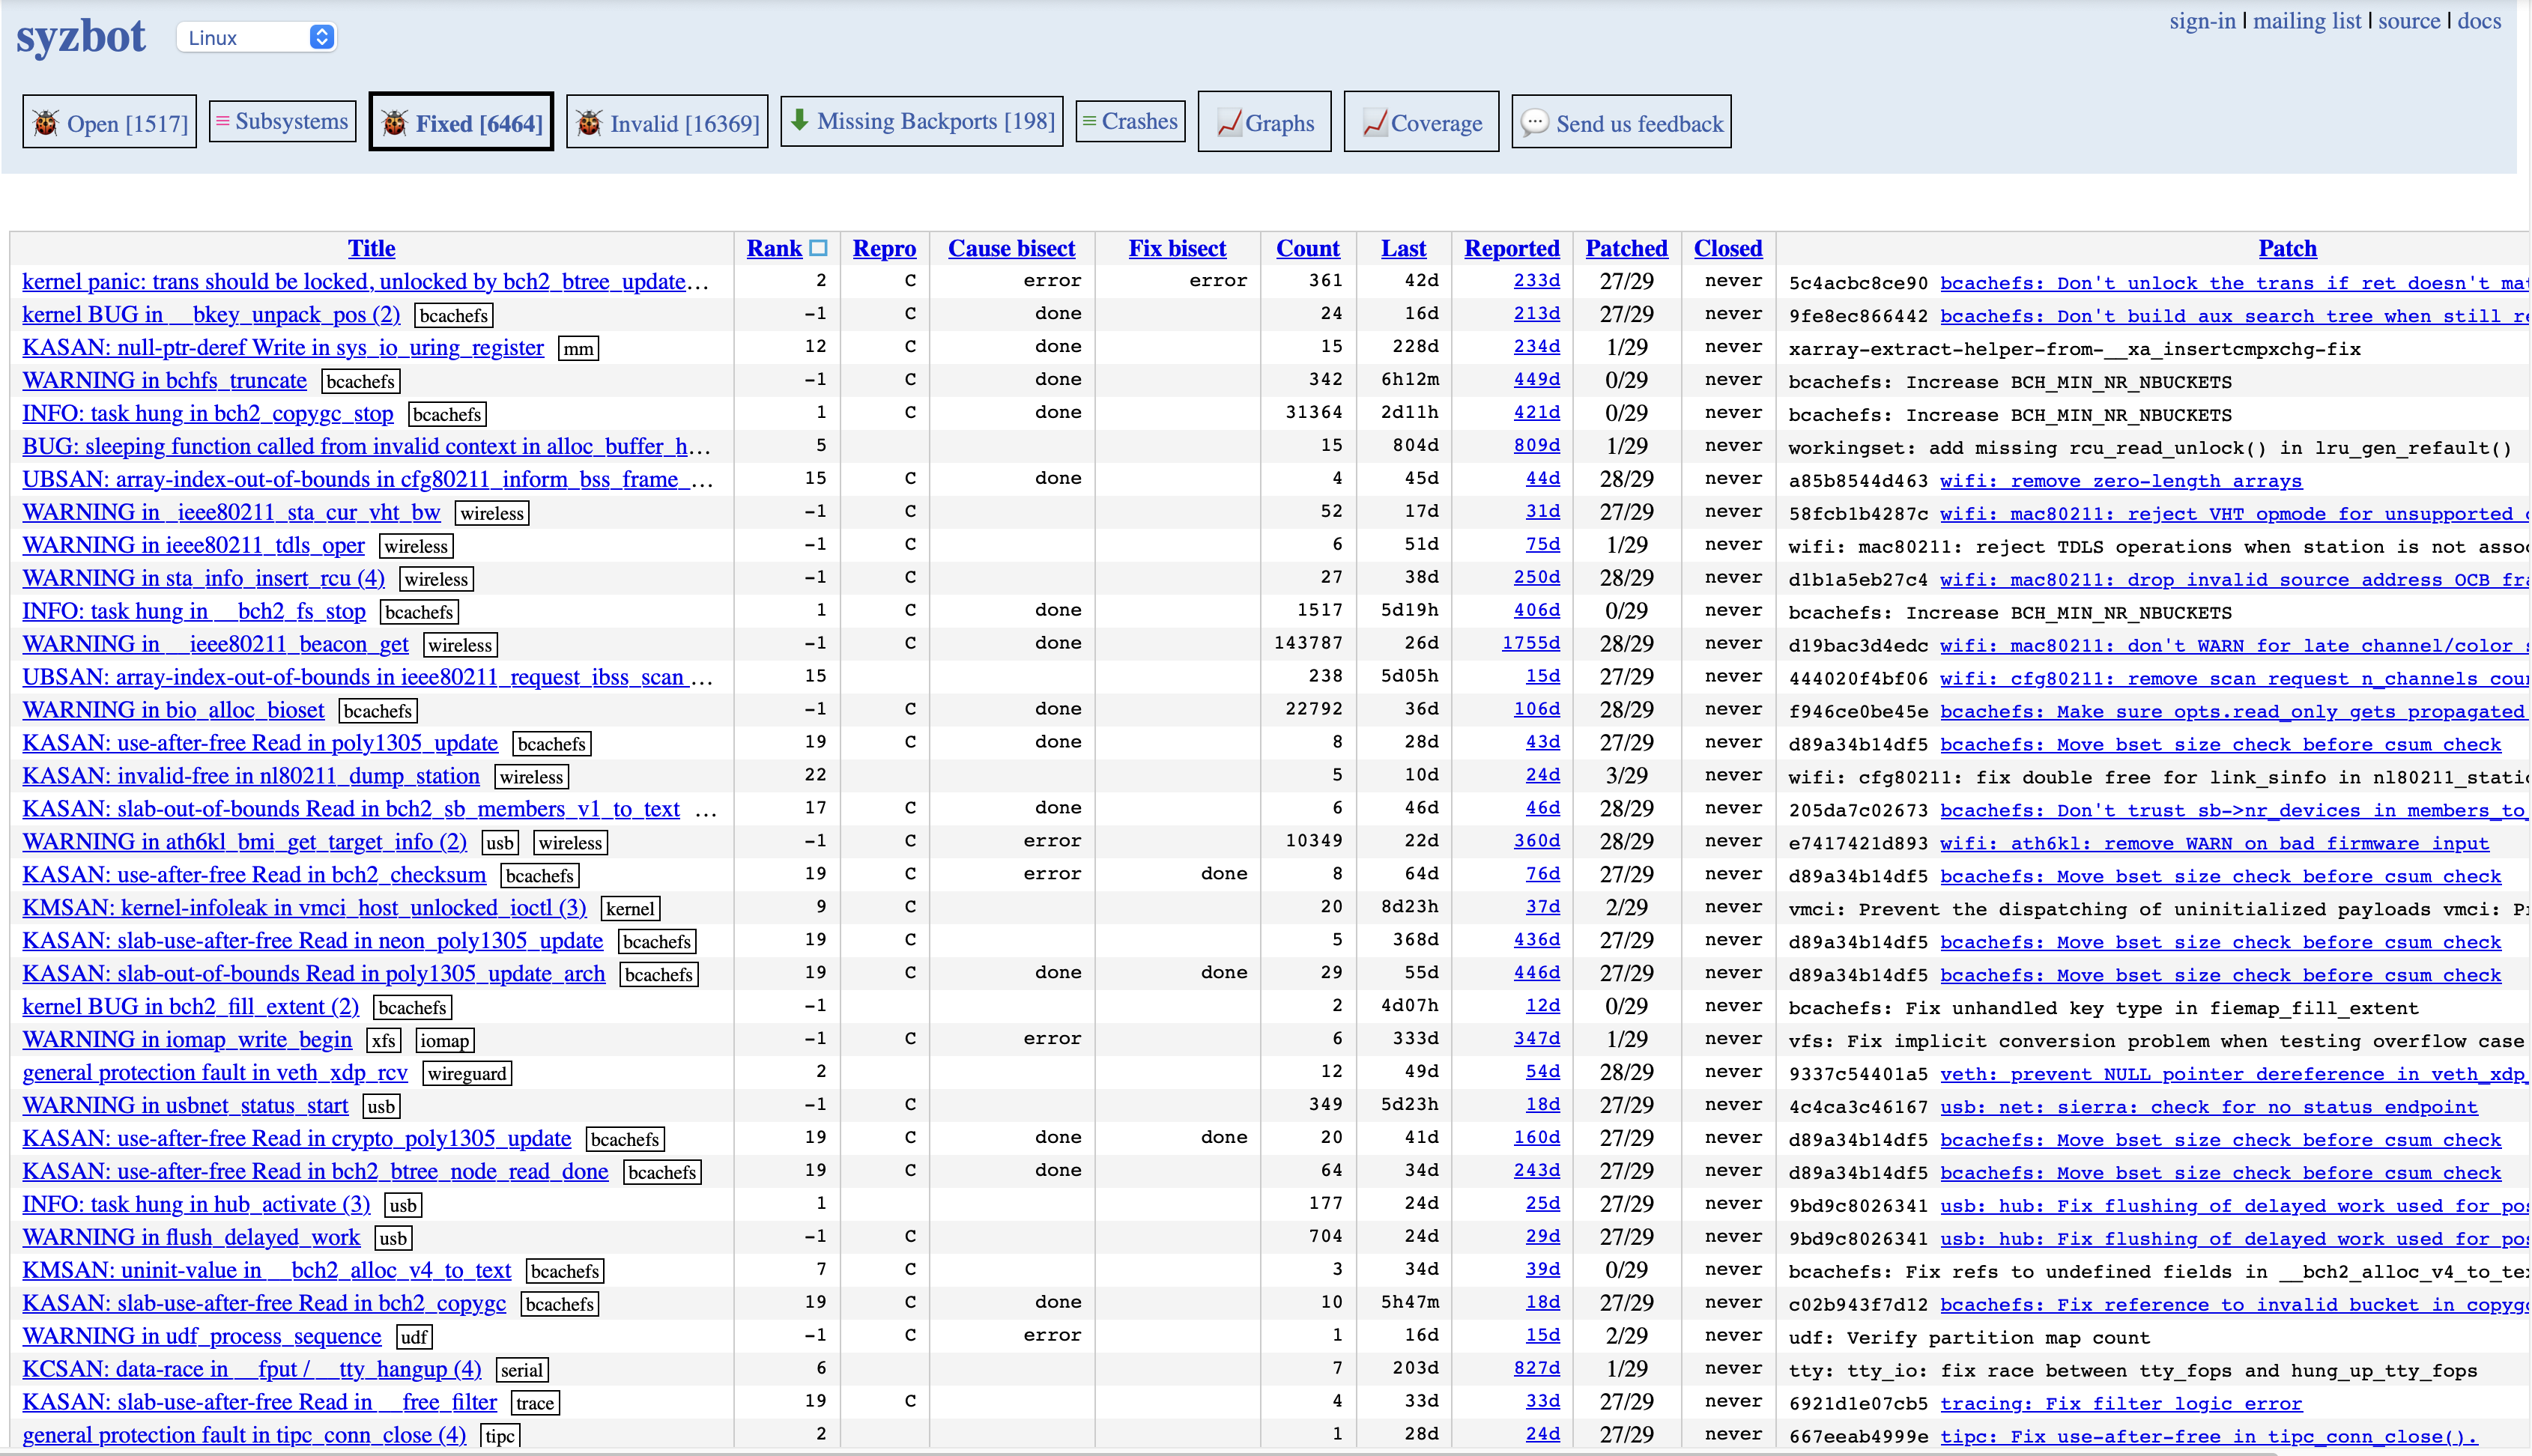
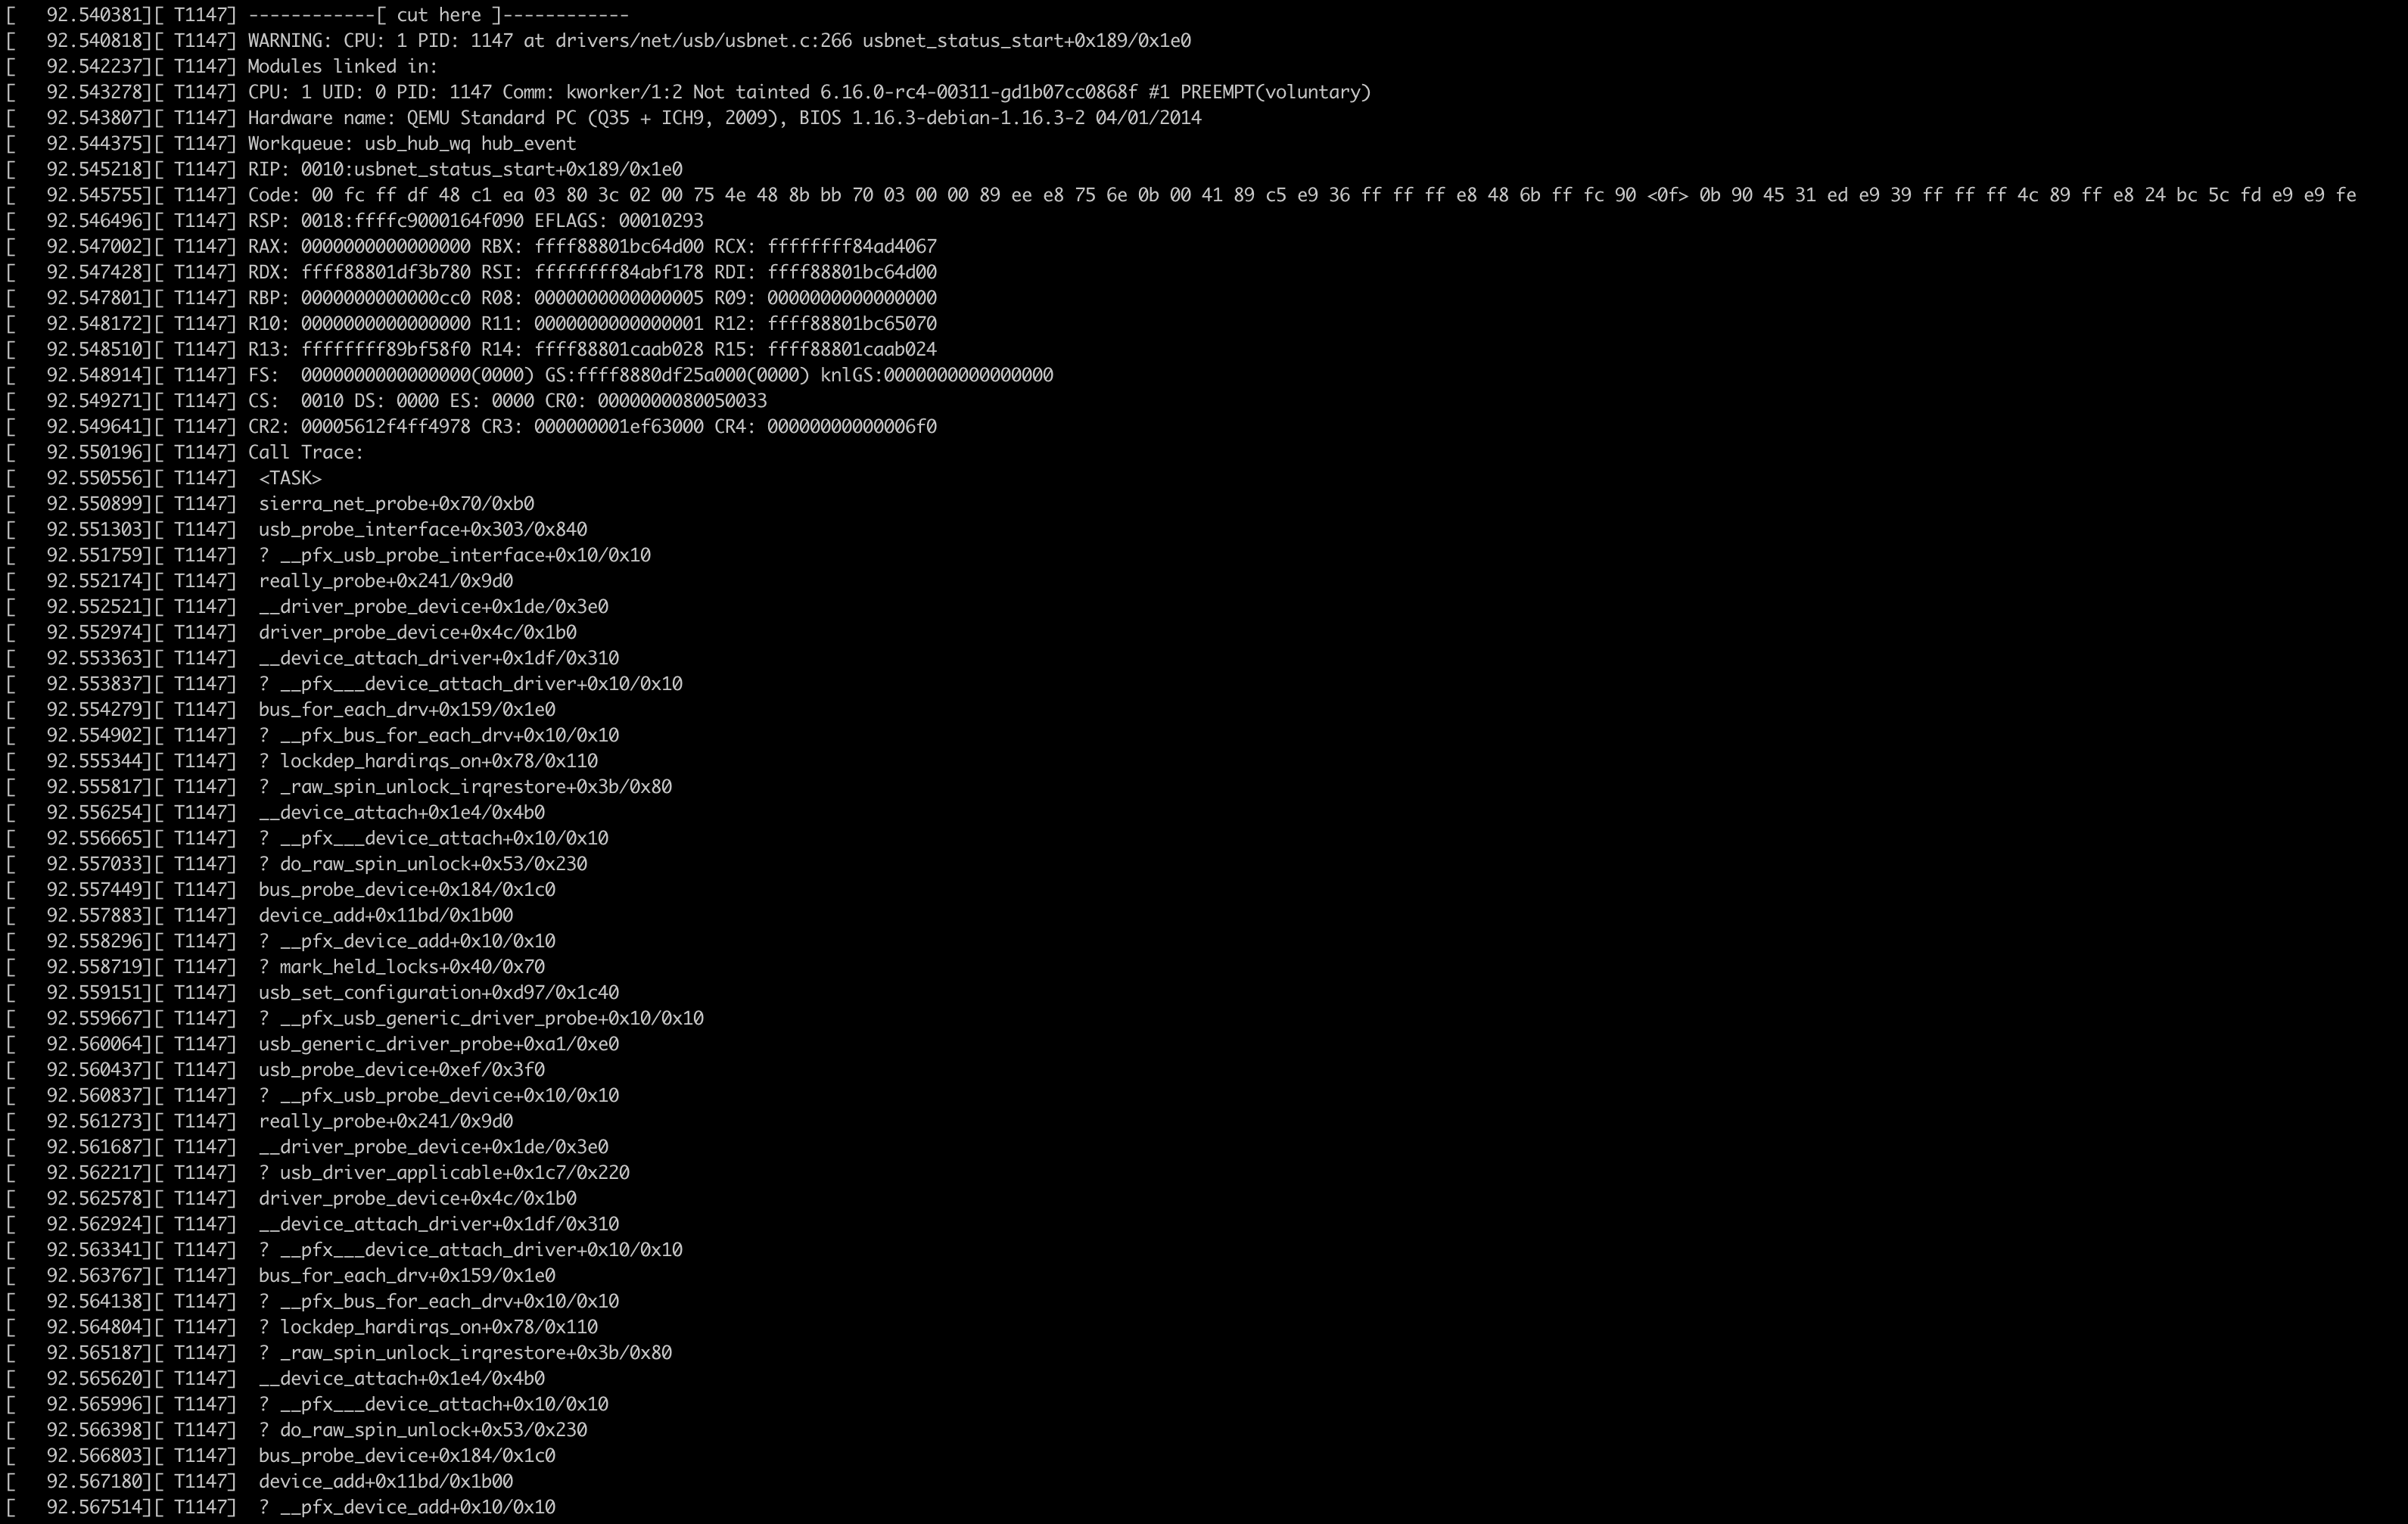
以下边这个为例子: https://syzkaller.appspot.com/bug?extid=3f89ec3d1d0842e95d50
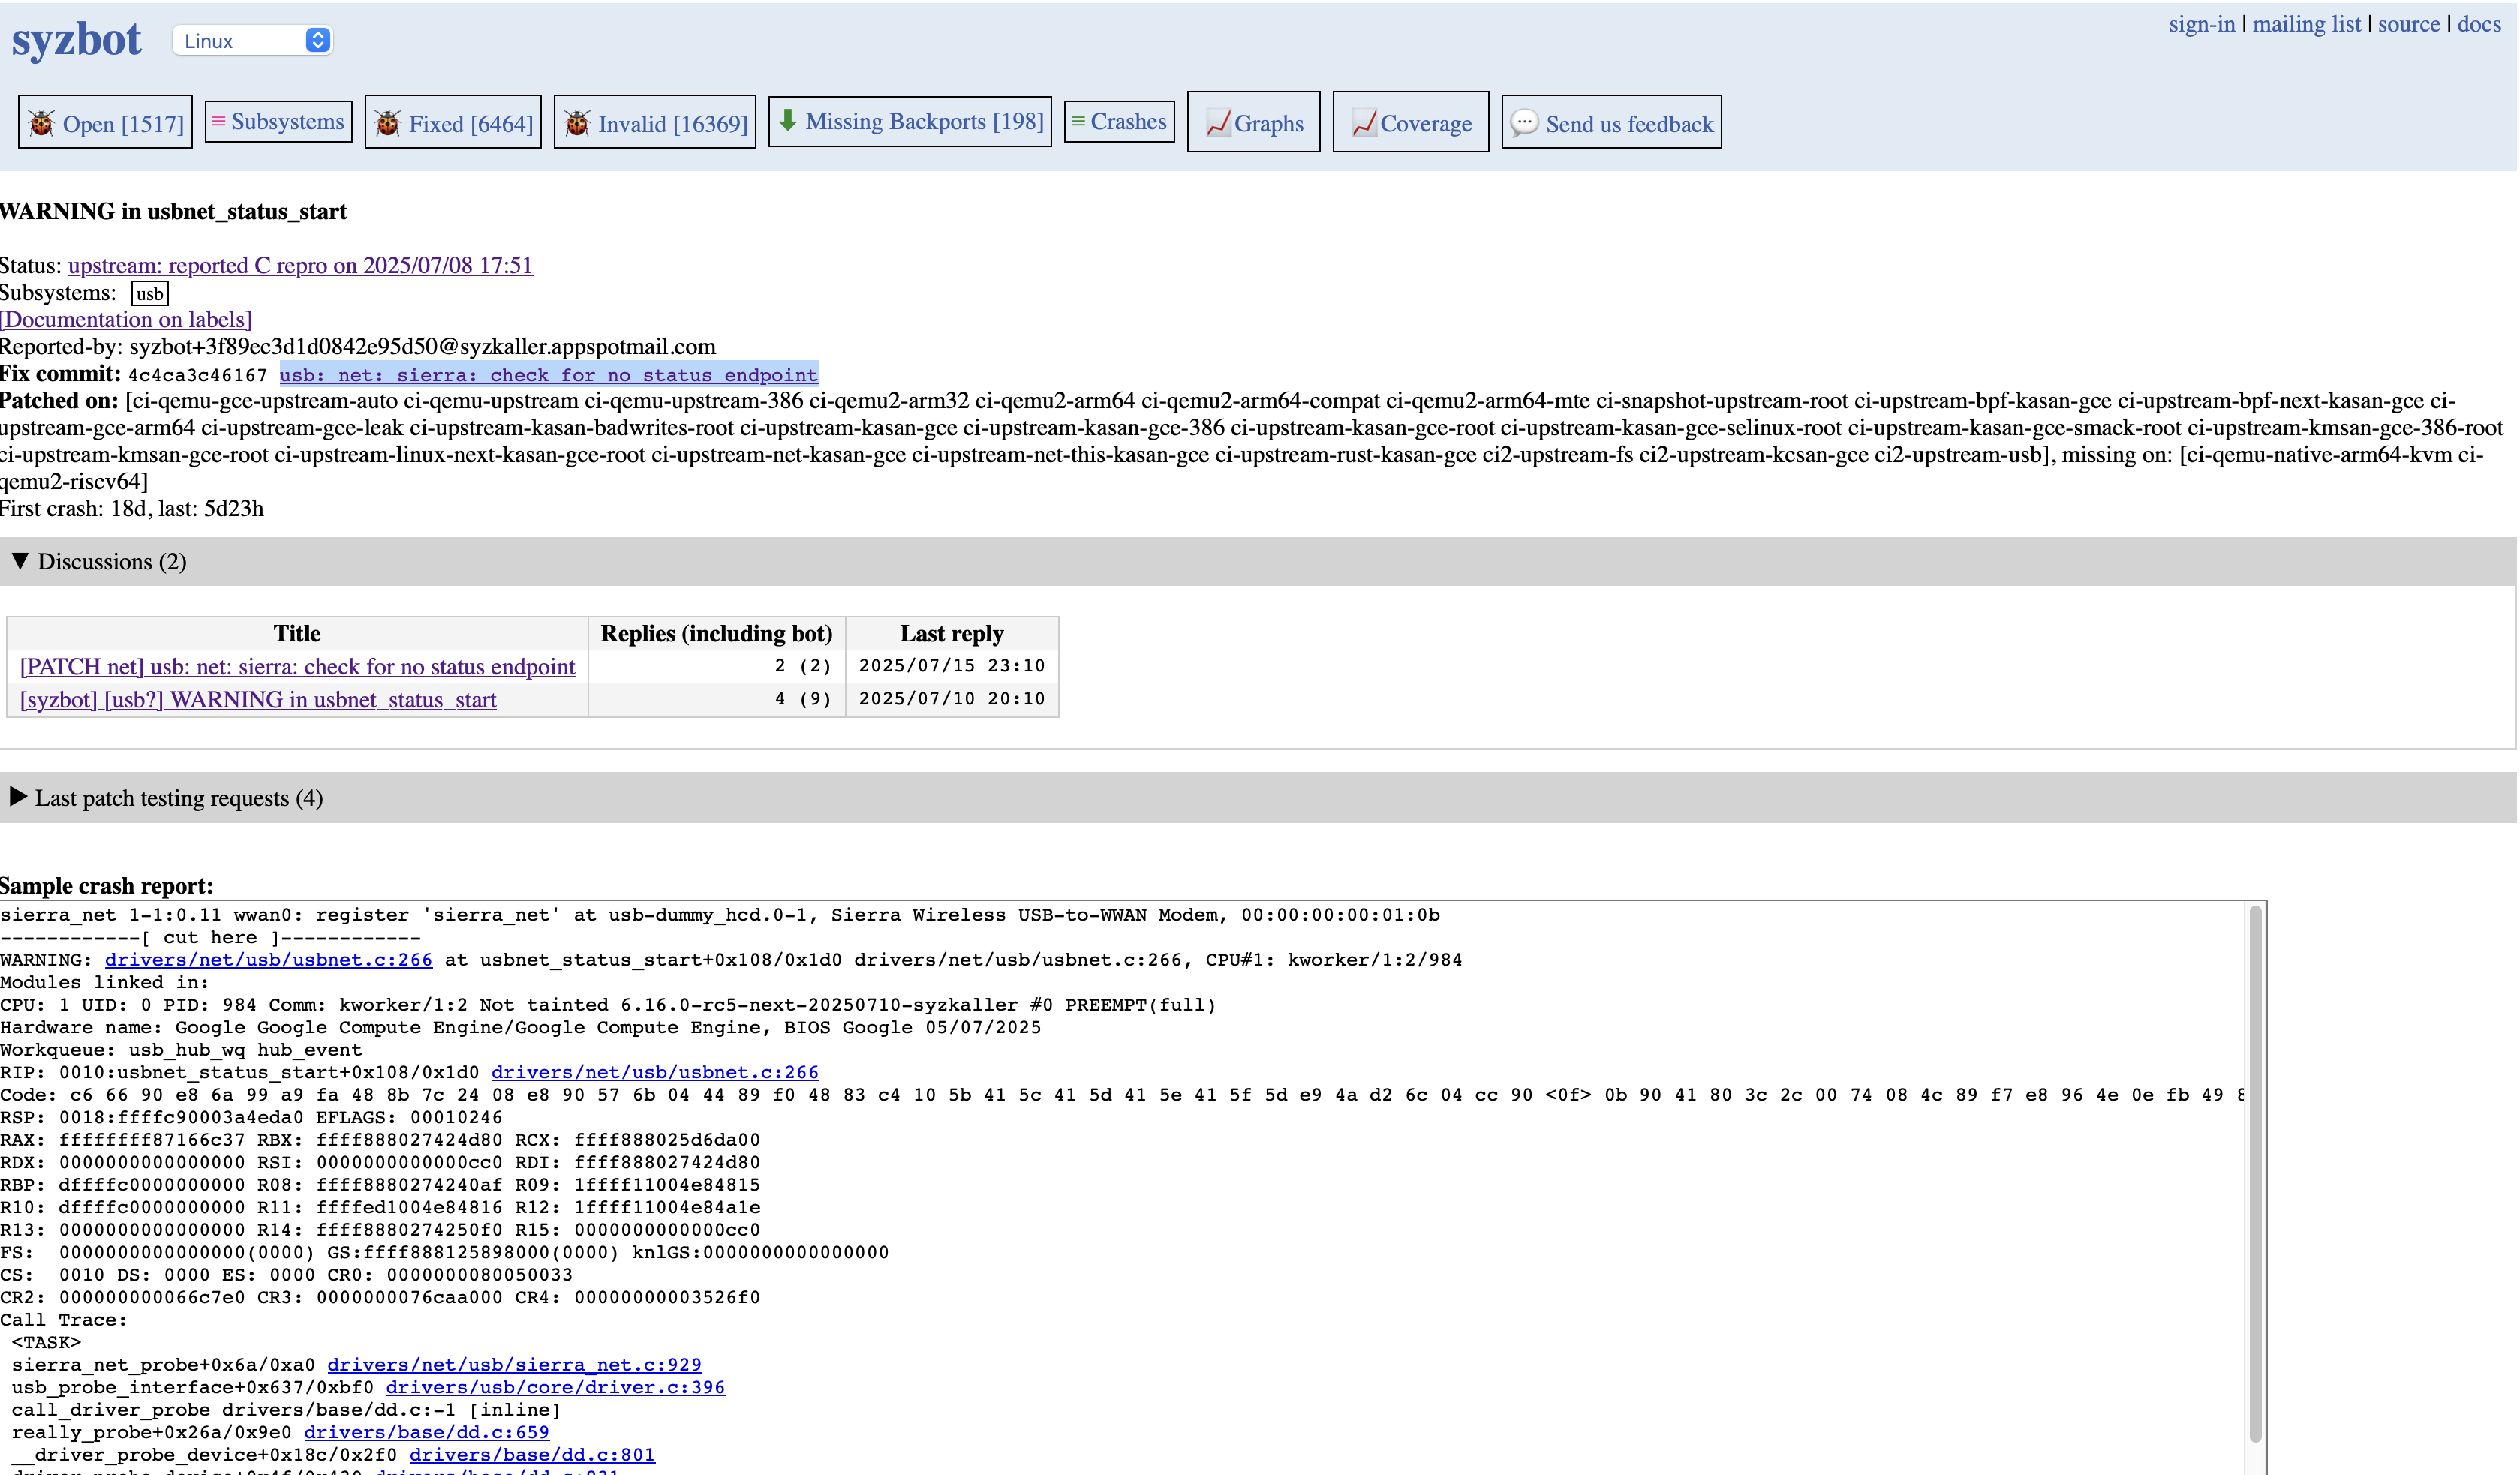
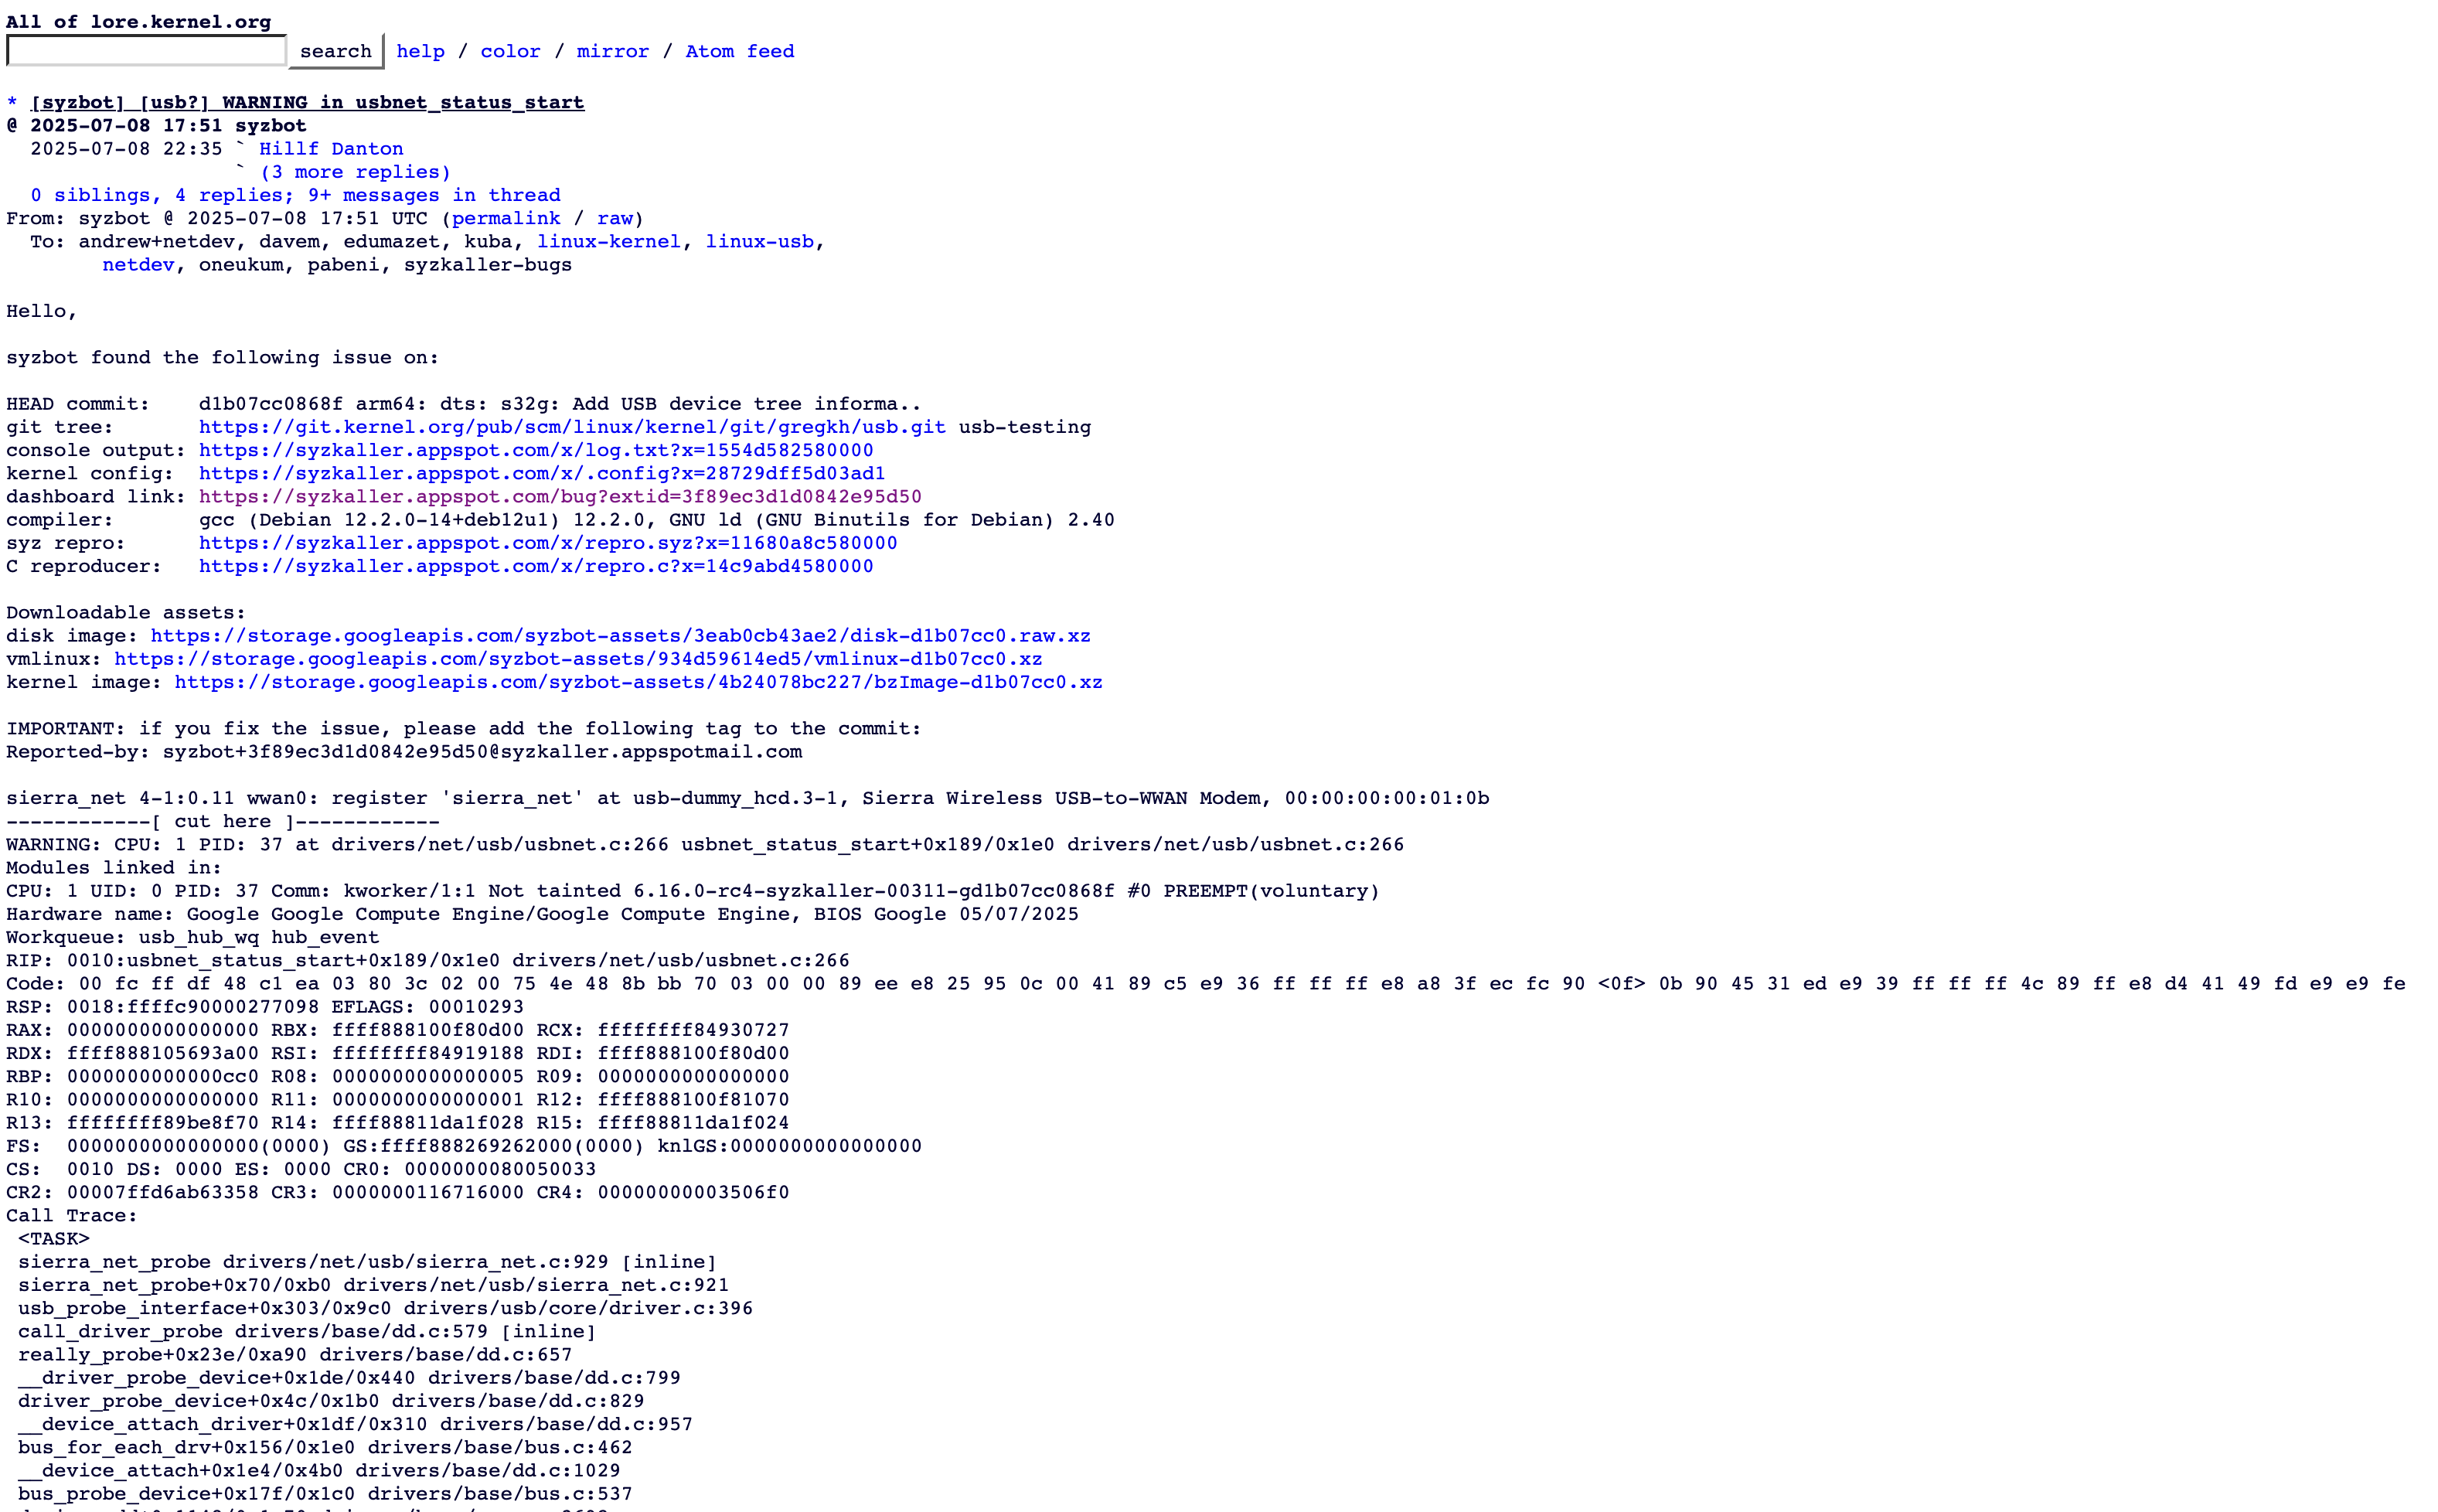
该问题相关的config文件以及测试信息已经在syzbot的报告邮件中,此外该问提的讨论过程在邮件列表中:https://lore.kernel.org/all/686d5a9f.050a0220.1ffab7.0017.GAE@google.com/T/
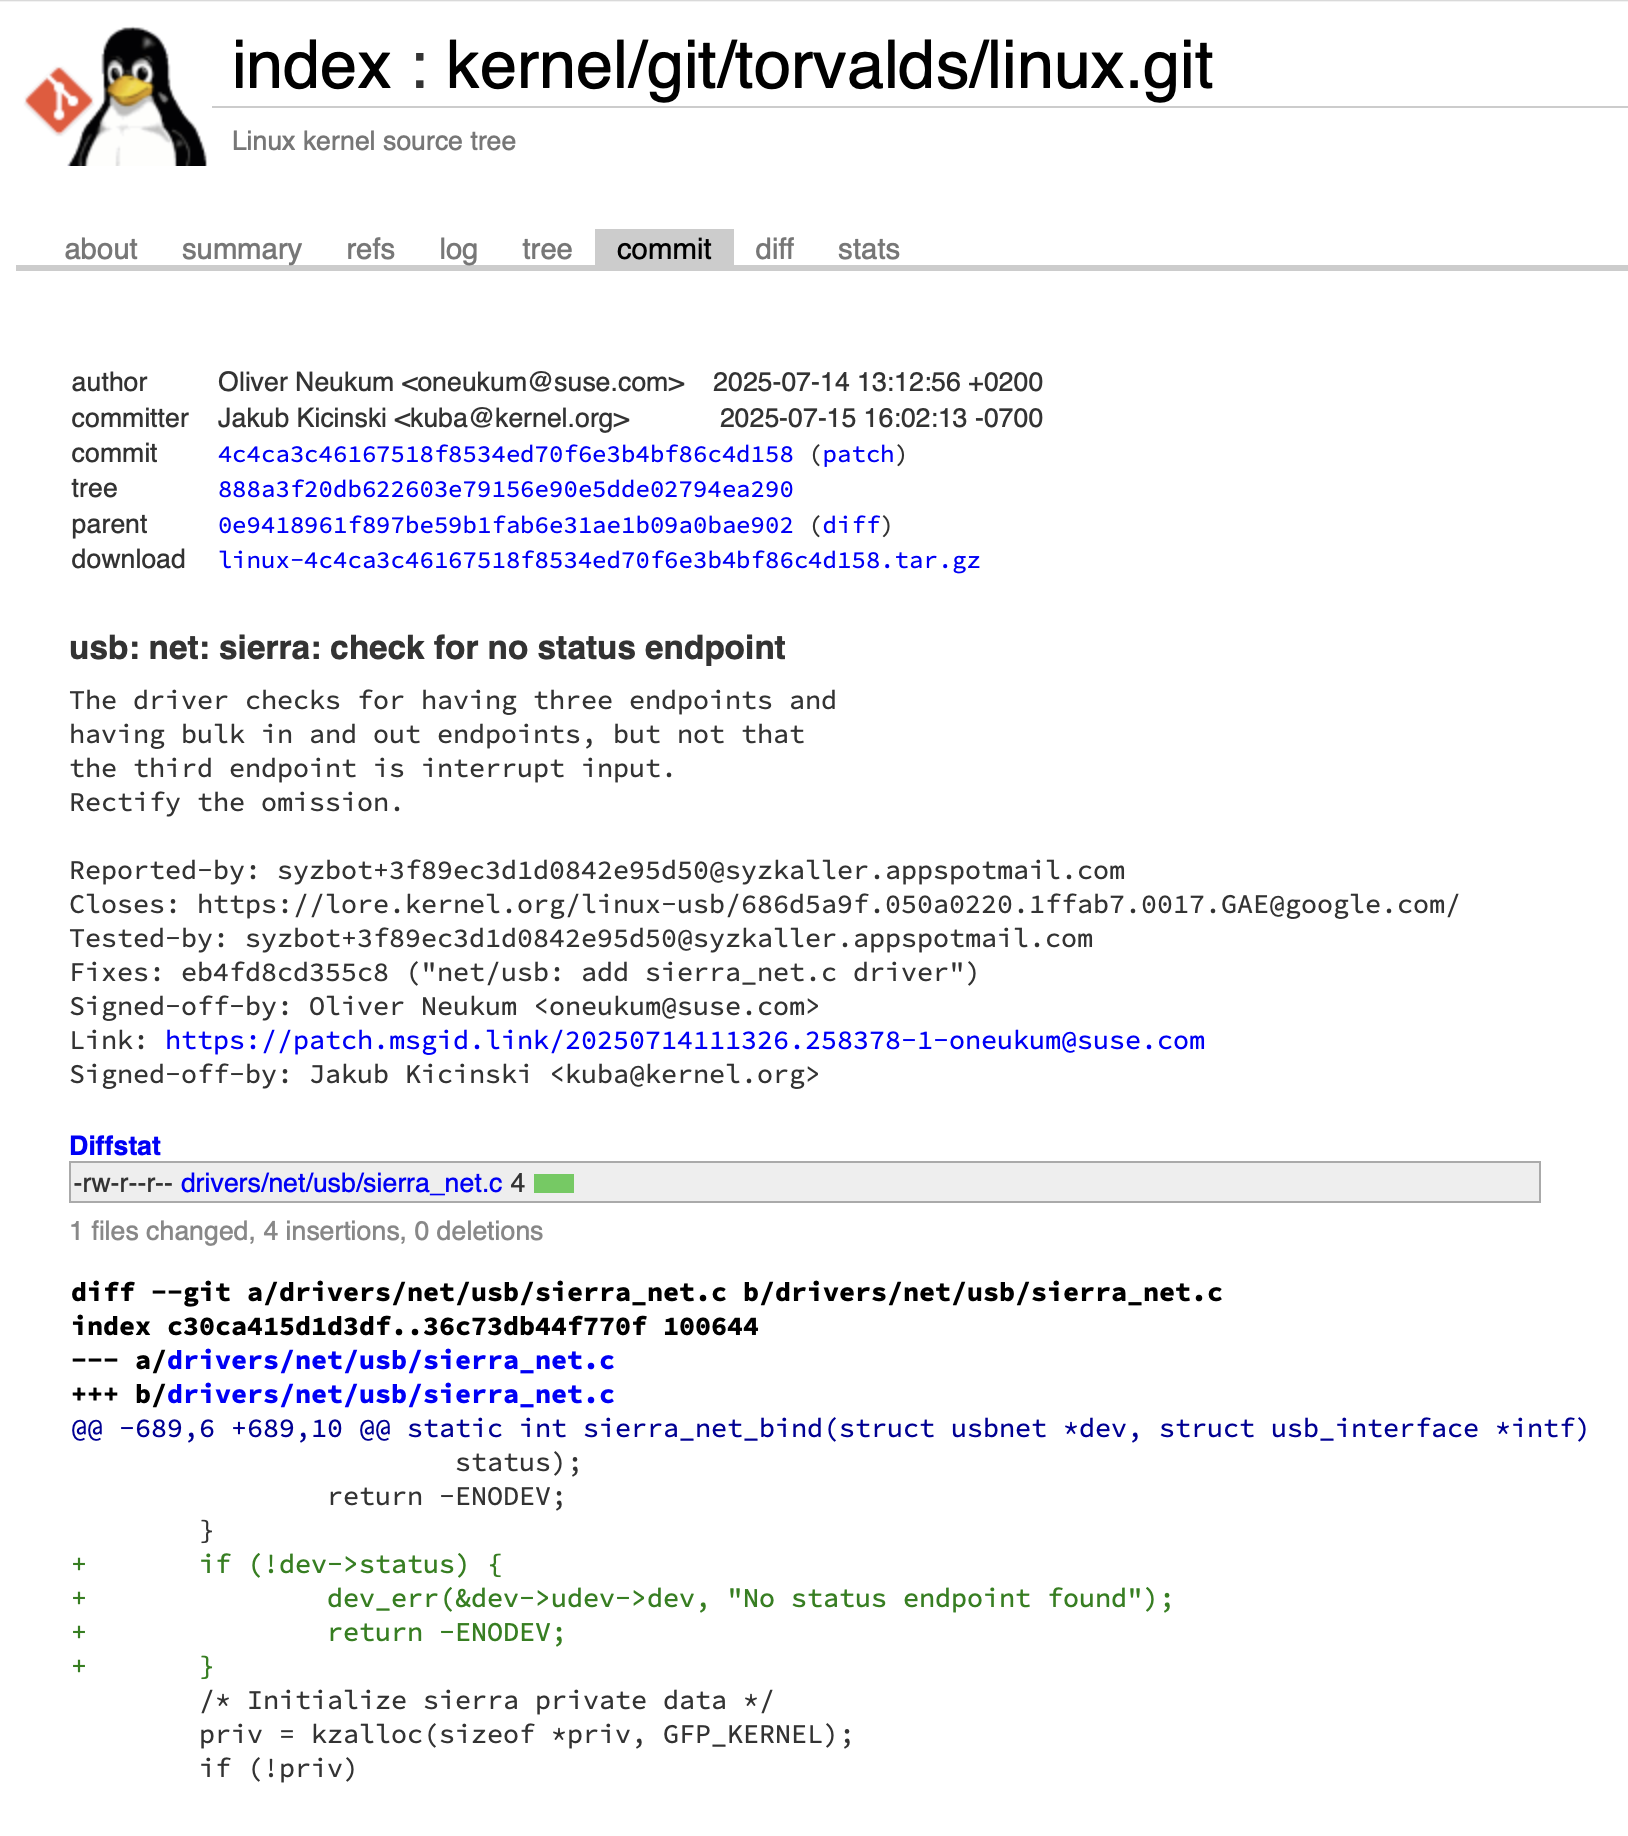
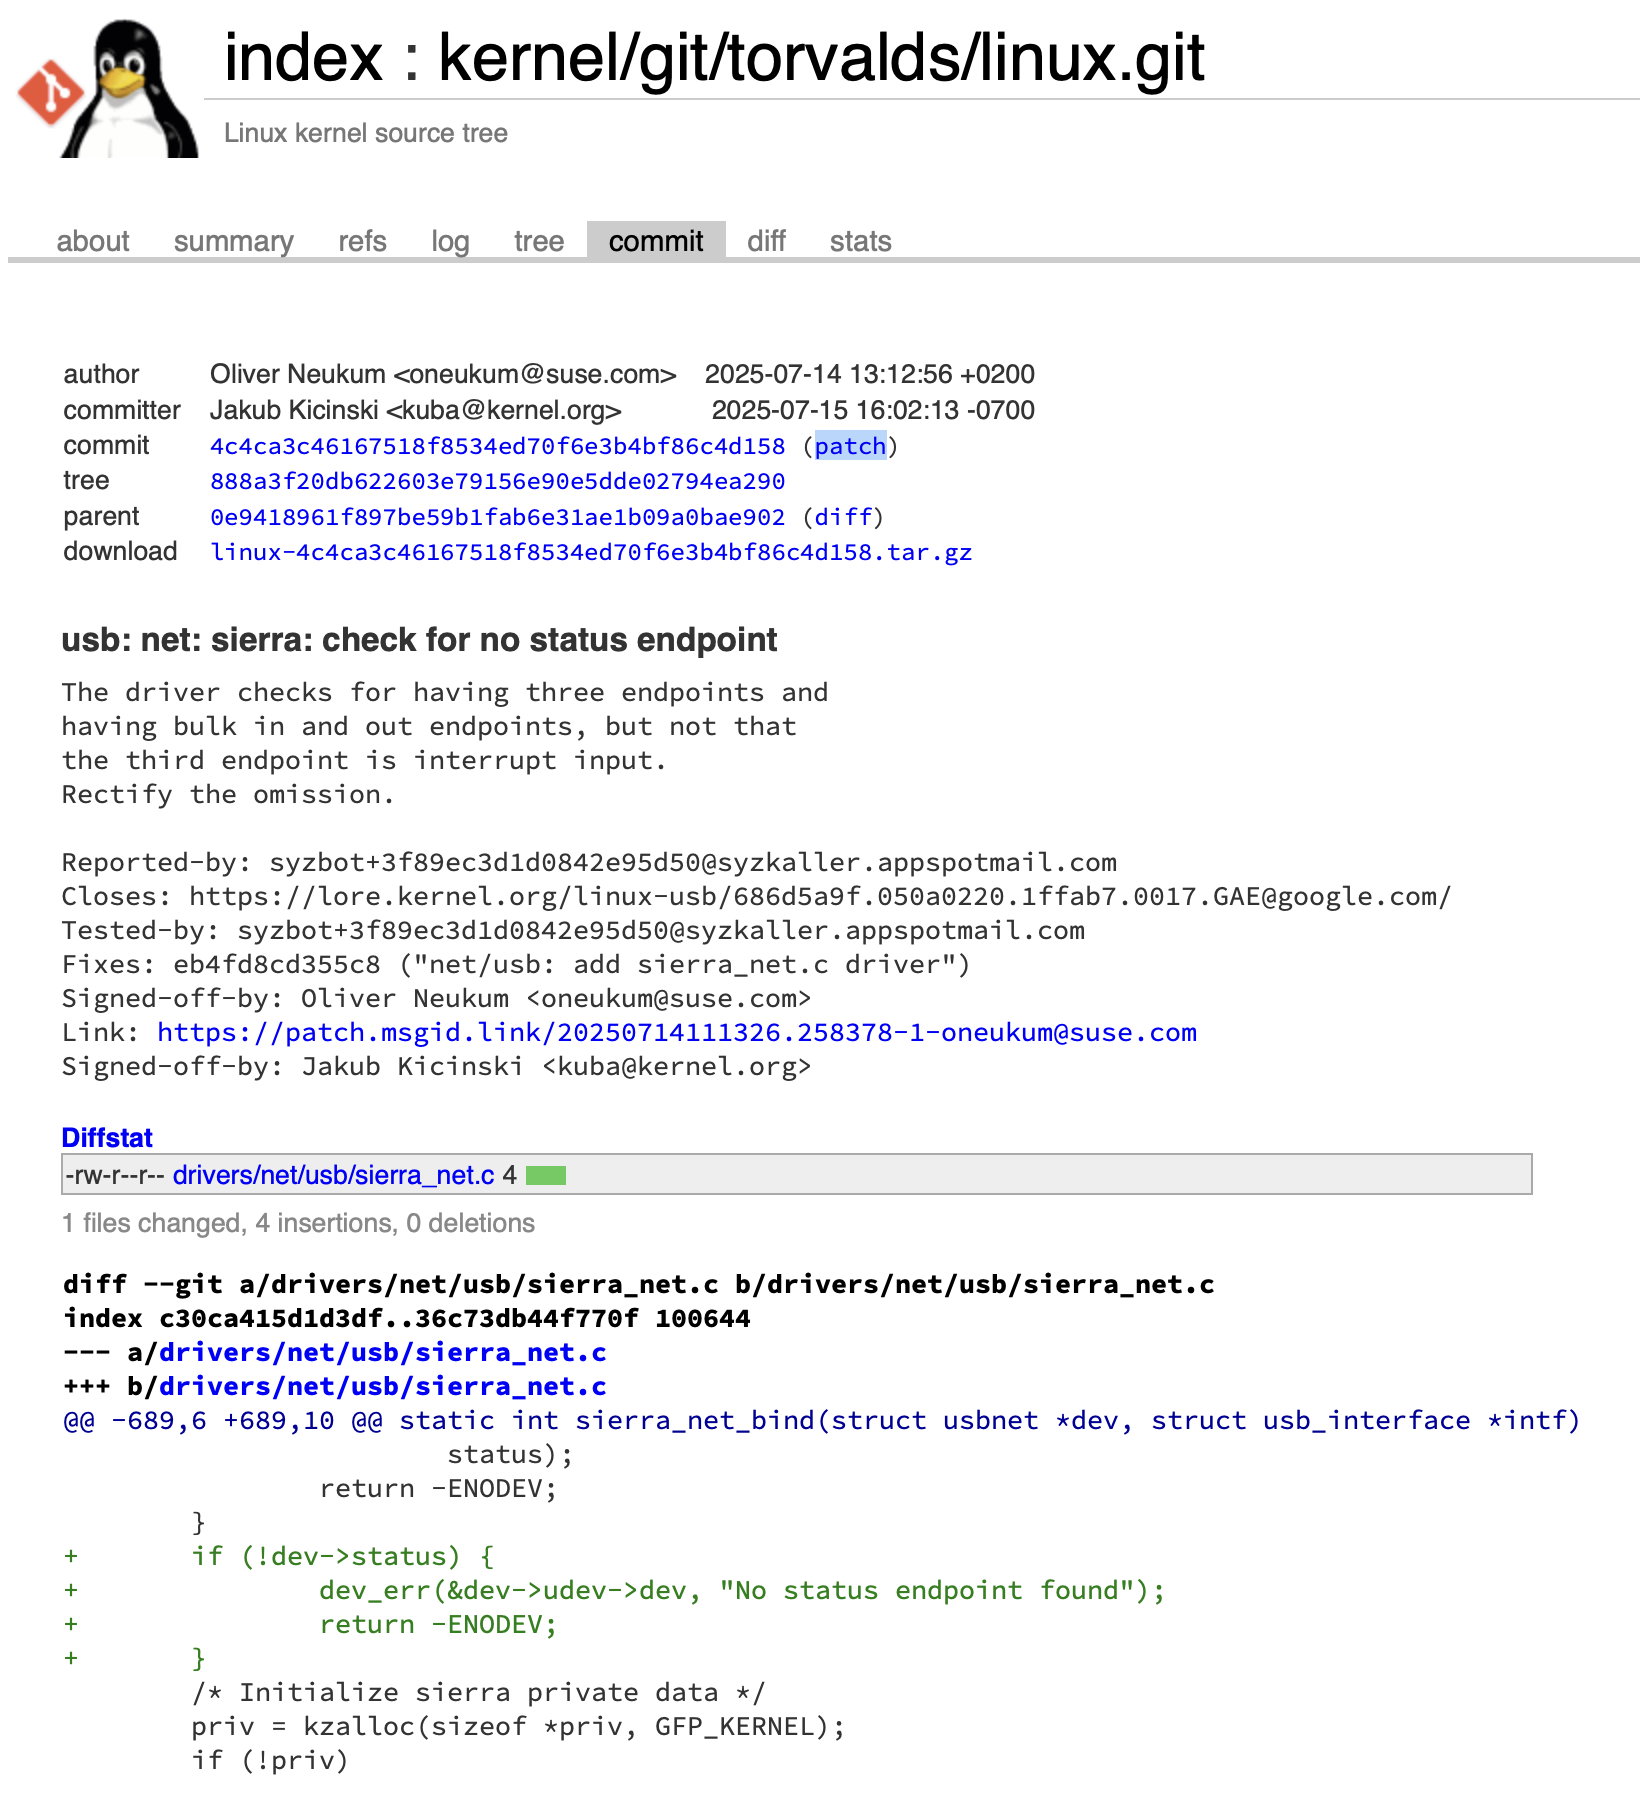
并且修复patch已经合入上游分支:https://git.kernel.org/pub/scm/linux/kernel/git/torvalds/linux.git/commit/?id=4c4ca3c46167518f8534ed70f6e3b4bf86c4d158
Step Two: Set Up the Local Workspace
 1
 2
 3
 4
 5
 6
 7
 8
 9
10
11
12
13
14
15
16
17
18
19
20
21
22
23
24
25
26
27
28
29
30
31
32
33
34
35
| mkdir -p ~/syz/usbnet_status_start
cd ~/syz/usbnet_status_start
# C reproducer
wget -O repro.c https://syzkaller.appspot.com/x/repro.c?x=14c9abd4580000
# Kernel config
wget -O .config https://syzkaller.appspot.com/x/.config?x=28729dff5d03ad1
# Optional: syzkaller binary reproducer
wget -O repro.syz https://syzkaller.appspot.com/x/repro.syz?x=11680a8c580000
# bzImage
wget https://storage.googleapis.com/syzbot-assets/4b24078bc227/bzImage-d1b07cc0.xz
# vmlinux (used for debugging and symbol resolution)
wget https://storage.googleapis.com/syzbot-assets/934d59614ed5/vmlinux-d1b07cc0.xz
# Disk image
wget https://storage.googleapis.com/syzbot-assets/3eab0cb43ae2/disk-d1b07cc0.raw.xz
# 解压
xz -d ./bzImage-d1b07cc0.xz ./disk-d1b07cc0.raw.xz ./vmlinux-d1b07cc0.xz
# 最终的工作空间目录结构如下
tree -a
.
├── bzImage-d1b07cc0
├── .config
├── disk-d1b07cc0.raw
├── repro.c
├── repro.syz
└── vmlinux-d1b07cc0
1 directory, 6 files
|
Step Three: Boot the syzbot Kernel in QEMU
 1
 2
 3
 4
 5
 6
 7
 8
 9
10
11
12
13
14
| sudo apt install qemu-system-x86
qemu-system-x86_64 \
-m 2048 \
-smp 2 \
-machine q35,accel=kvm \
-cpu host \
-kernel bzImage-d1b07cc0 \
-append "root=/dev/sda1 console=ttyS0" \
-drive file=disk-d1b07cc0.raw,format=raw \
-nographic \
-enable-kvm \
-netdev user,id=net0,hostfwd=tcp::10022-:22 \
-device e1000,netdev=net0
|
| 参数 | 解释 |
|---|
| qemu-system-x86_64 | 启动一个x86_64的模拟器 |
| -m 2048 | 分配2GB内存 |
| -smp 2 | 分配2个CPU核心 |
| -machine q35,accel=kvm | 使用 Q35芯片组(较新的 Intel 芯片组,支持 PCIe 设备等现代硬件)accel=kvm:启用 KVM(内核虚拟化模块)加速,依赖主机支持 VT-x/AMD-V |
| -cpu host | 使用主机的 CPU 配置(即暴露主机 CPU 的全部指令集特性给虚拟机),比如 AVX、SSE 等。 |
| -kernel bzImage-b56bbaf8 | 指定一个已编译好的 Linux 内核镜像文件 |
| -append “root=/dev/sda1 console=ttyS0” | 给内核传递启动参数:root=/dev/sda1:告诉内核,根文件系统位于 /dev/sda1,也就是第一个硬盘的第一个分区。console=ttyS0:将控制台绑定到串口 ttyS0,这是为了搭配 -nographic 让你可以通过终端看到内核输出。 |
| -drive file=disk-b56bbaf8.raw,format=raw | 挂载一个原始格式(raw)的虚拟硬盘文件,默认**.raw 磁盘镜像是可写的。**也就是说,虚拟机内部所做的任何修改在重启后都会被保留。如果希望每次测试都从干净的状态开始,可以通过在 -drive 参数中添加snapshot=on 来启用快照模式,这会让虚拟机运行在一个临时的覆盖层(overlay)上,所有更改在关机后都会被丢弃。使用这个选项可以确保每次测试运行都是干净、可复现的。 |
| -nographic | 不使用图形界面,所有输入输出都通过终端(命令行)进行 |
| -enable-kvm | 启用 KVM硬件虚拟化加速(和 -machine accel=kvm 作用类似,通常两者一起写以防兼容性问题)。 |
| -netdev user,id=net0,hostfwd=tcp::10022-:22 | 使用 QEMU 的 用户模式网络(user mode networking)。id=net0 给该网络接口一个 ID 名称。hostfwd=tcp::10022-:22 实现端口转发:把主机的 10022端口 映射到虚拟机的 22端口,即虚拟机的SSH服务。 |
| -device e1000,netdev=net0 | 使用 e1000 模拟一个 Intel E1000 网卡(兼容性较好)。把它连接到上面定义的 net0 网络设备。 |
由于我本身就是在一个虚拟机中运行ubuntu,因此硬件加速相关的参数都不能用:
 1
 2
 3
 4
 5
 6
 7
 8
 9
10
11
| qemu-system-x86_64 \
-m 2048 \
-smp 2 \
-machine q35 \
-cpu qemu64 \
-kernel bzImage-d1b07cc0 \
-append "root=/dev/sda1 console=ttyS0" \
-drive file=disk-d1b07cc0.raw,format=raw,snapshot=on \
-nographic \
-netdev user,id=net0,hostfwd=tcp::10022-:22 \
-device e1000,netdev=net0
|
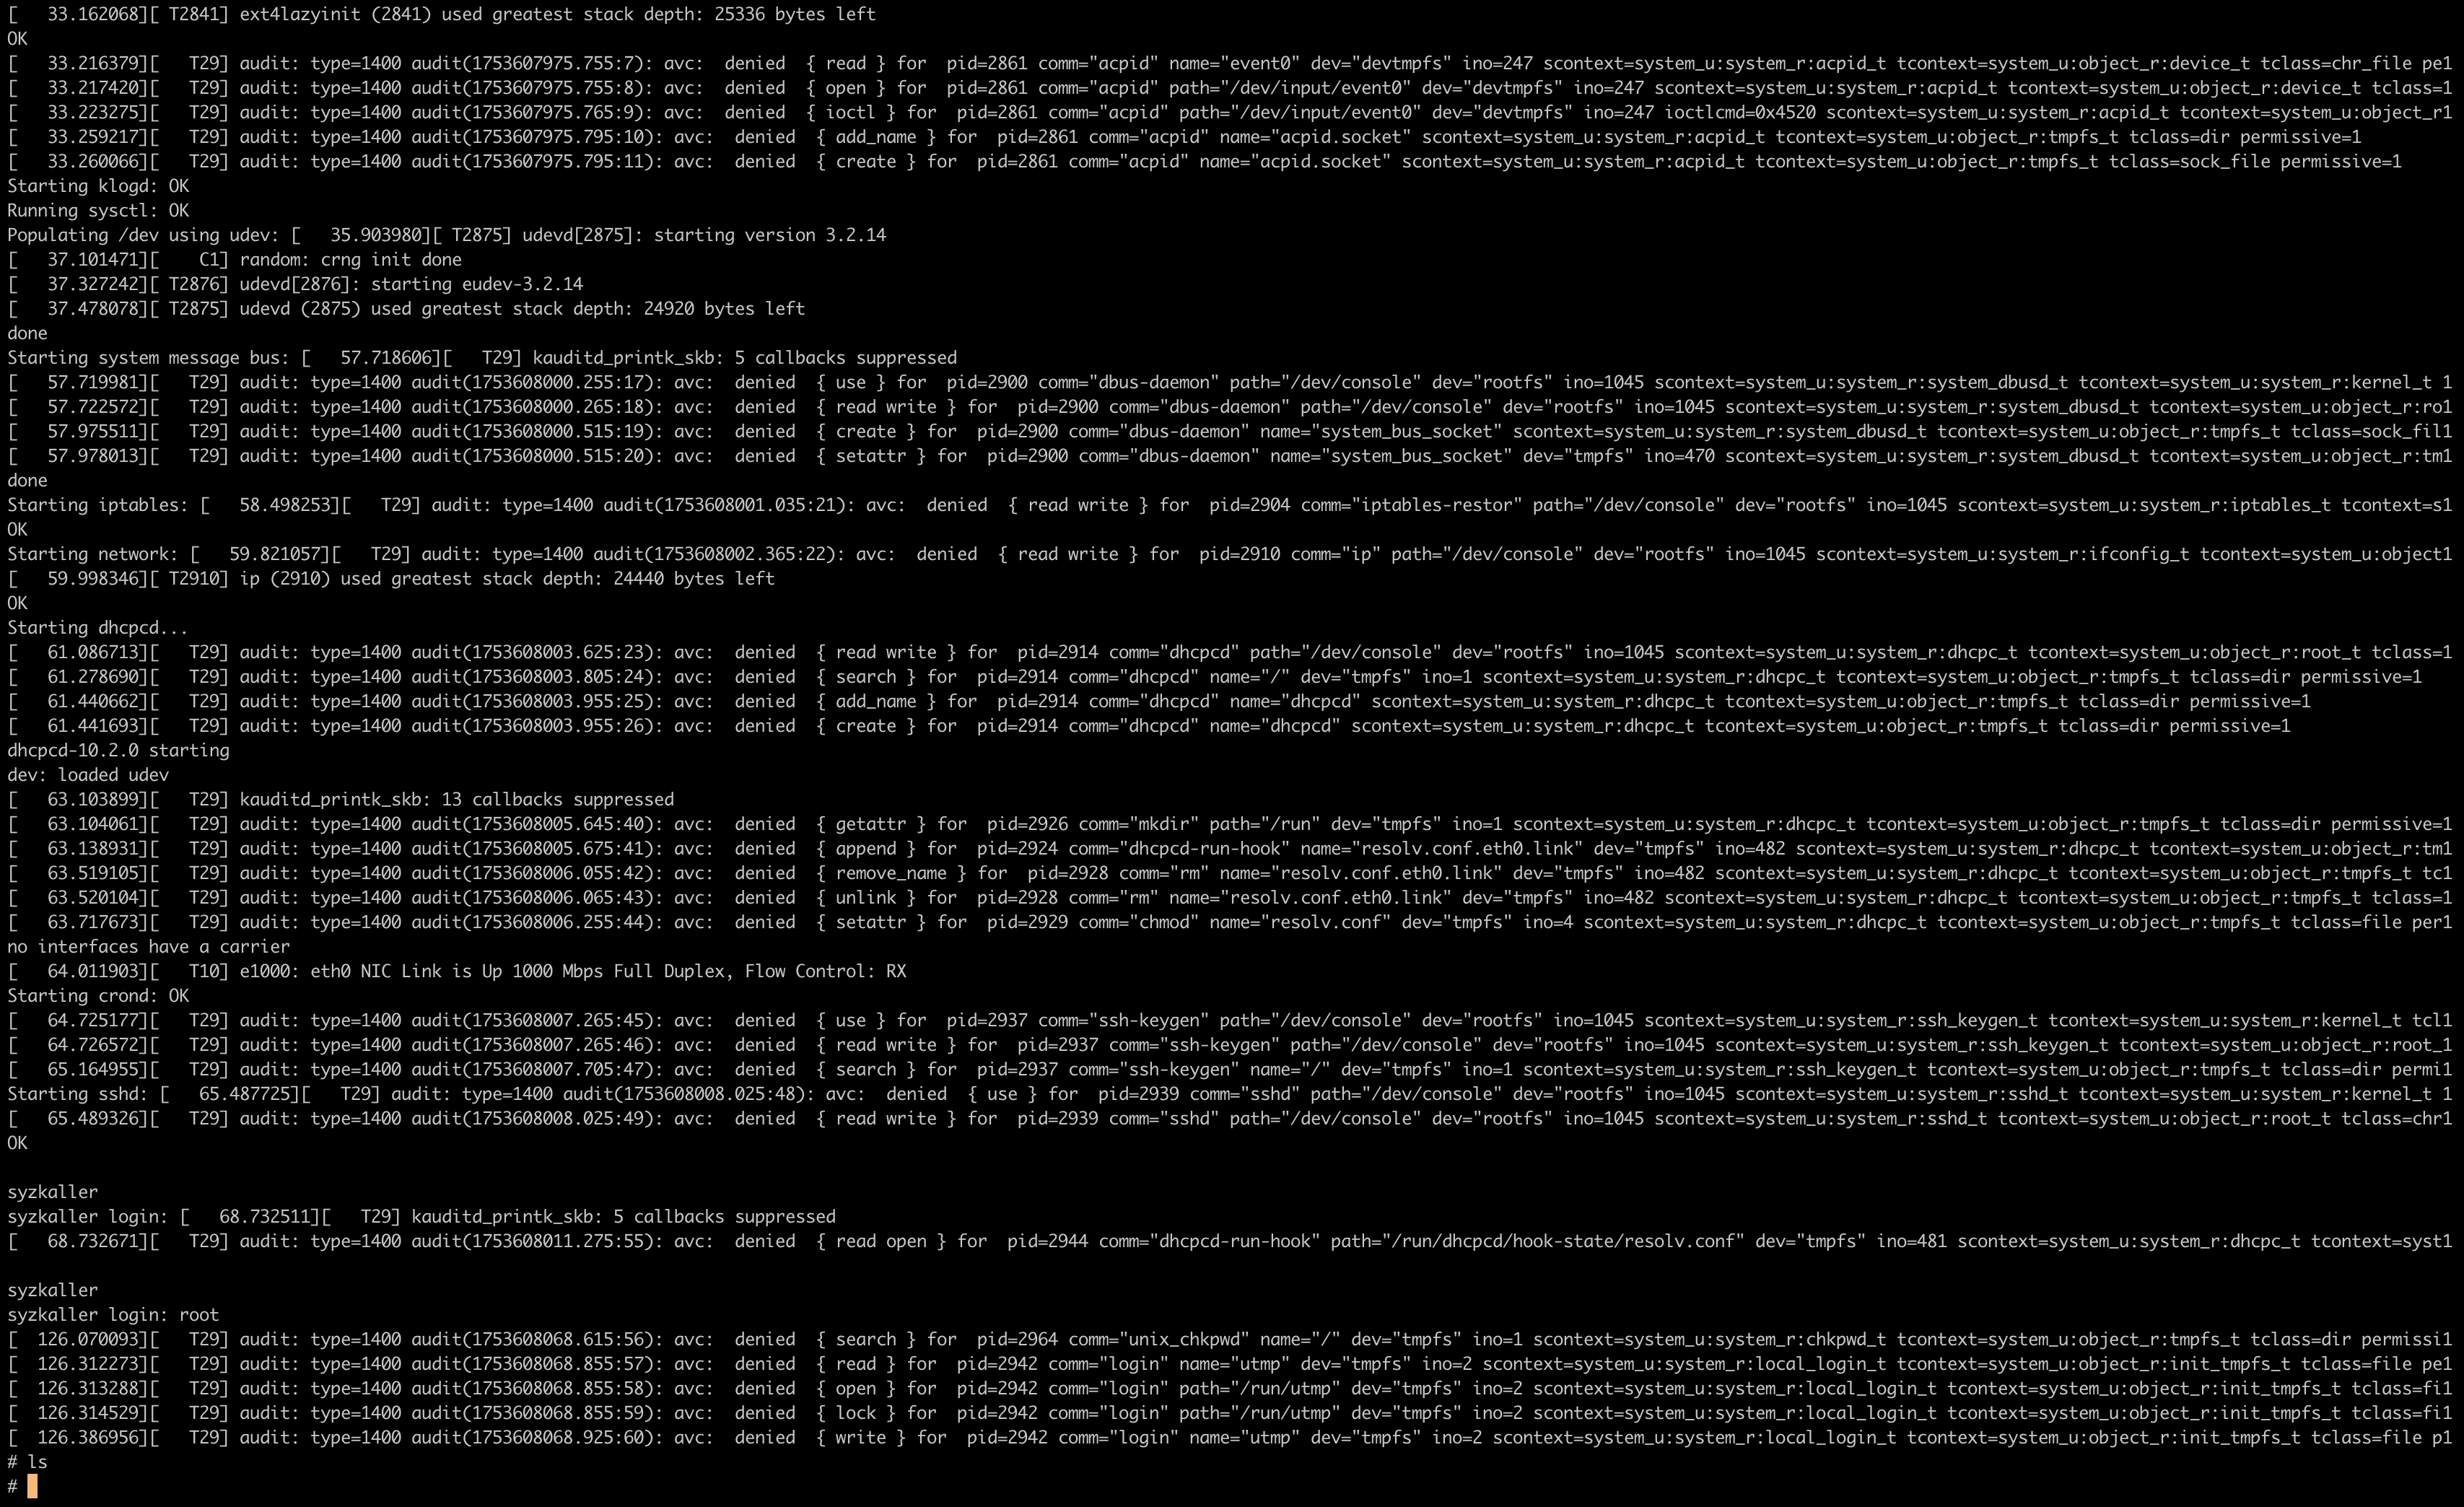
启动成功,登录用户名:root 无密码
Step Four: Run the Reproducer in the Original Image
Syzkaller 的报告通常会提供两种类型的复现程序(reproducer):
- 一个 C 源码文件(repro.c)
- 一个二进制格式的程序(repro.syz),用于在 syz-execprog 下运行。
如果两者都提供了,建议优先使用 C 版本,因为它通常更容易阅读、运行和调试。
使用复现器
编译 syz-execprog 和 syz-executor
1
2
3
4
| git clone https://github.com/google/syzkaller.git
cd syzkaller
sudo apt install golang-go
make TARGETOS=linux TARGETARCH=amd64
|
将复现程序拷贝进qemu模拟器
 1
 2
 3
 4
 5
 6
 7
 8
 9
10
11
| cp bin/linux_amd64/syz-execprog ~/syz/usbnet_status_start/assets/
cp bin/linux_amd64/syz-executor ~/syz/usbnet_status_start/assets/
scp -P 10022 \
-o UserKnownHostsFile=/dev/null \
-o StrictHostKeyChecking=no \
~/syz/usbnet_status_start/assets/syz-execprog \
~/syz/usbnet_status_start/assets/syz-executor \
~/syz/usbnet_status_start/assets/repro \
~/syz/usbnet_status_start/assets/repro.syz \
root@127.0.0.1:/root/
|
使用复现器复现问题:
1
| ./syz-execprog -enable=all -repeat=0 -procs=6 ./repro.syz
|
这将调用与 syzkaller 构造的完全相同的系统调用序列。如果内核漏洞仍然存在,那么崩溃或相应的警告信息应该会出现在控制台上。这说明复现程序仍然有效,并且测试环境配置是正确的。
编译复现程序
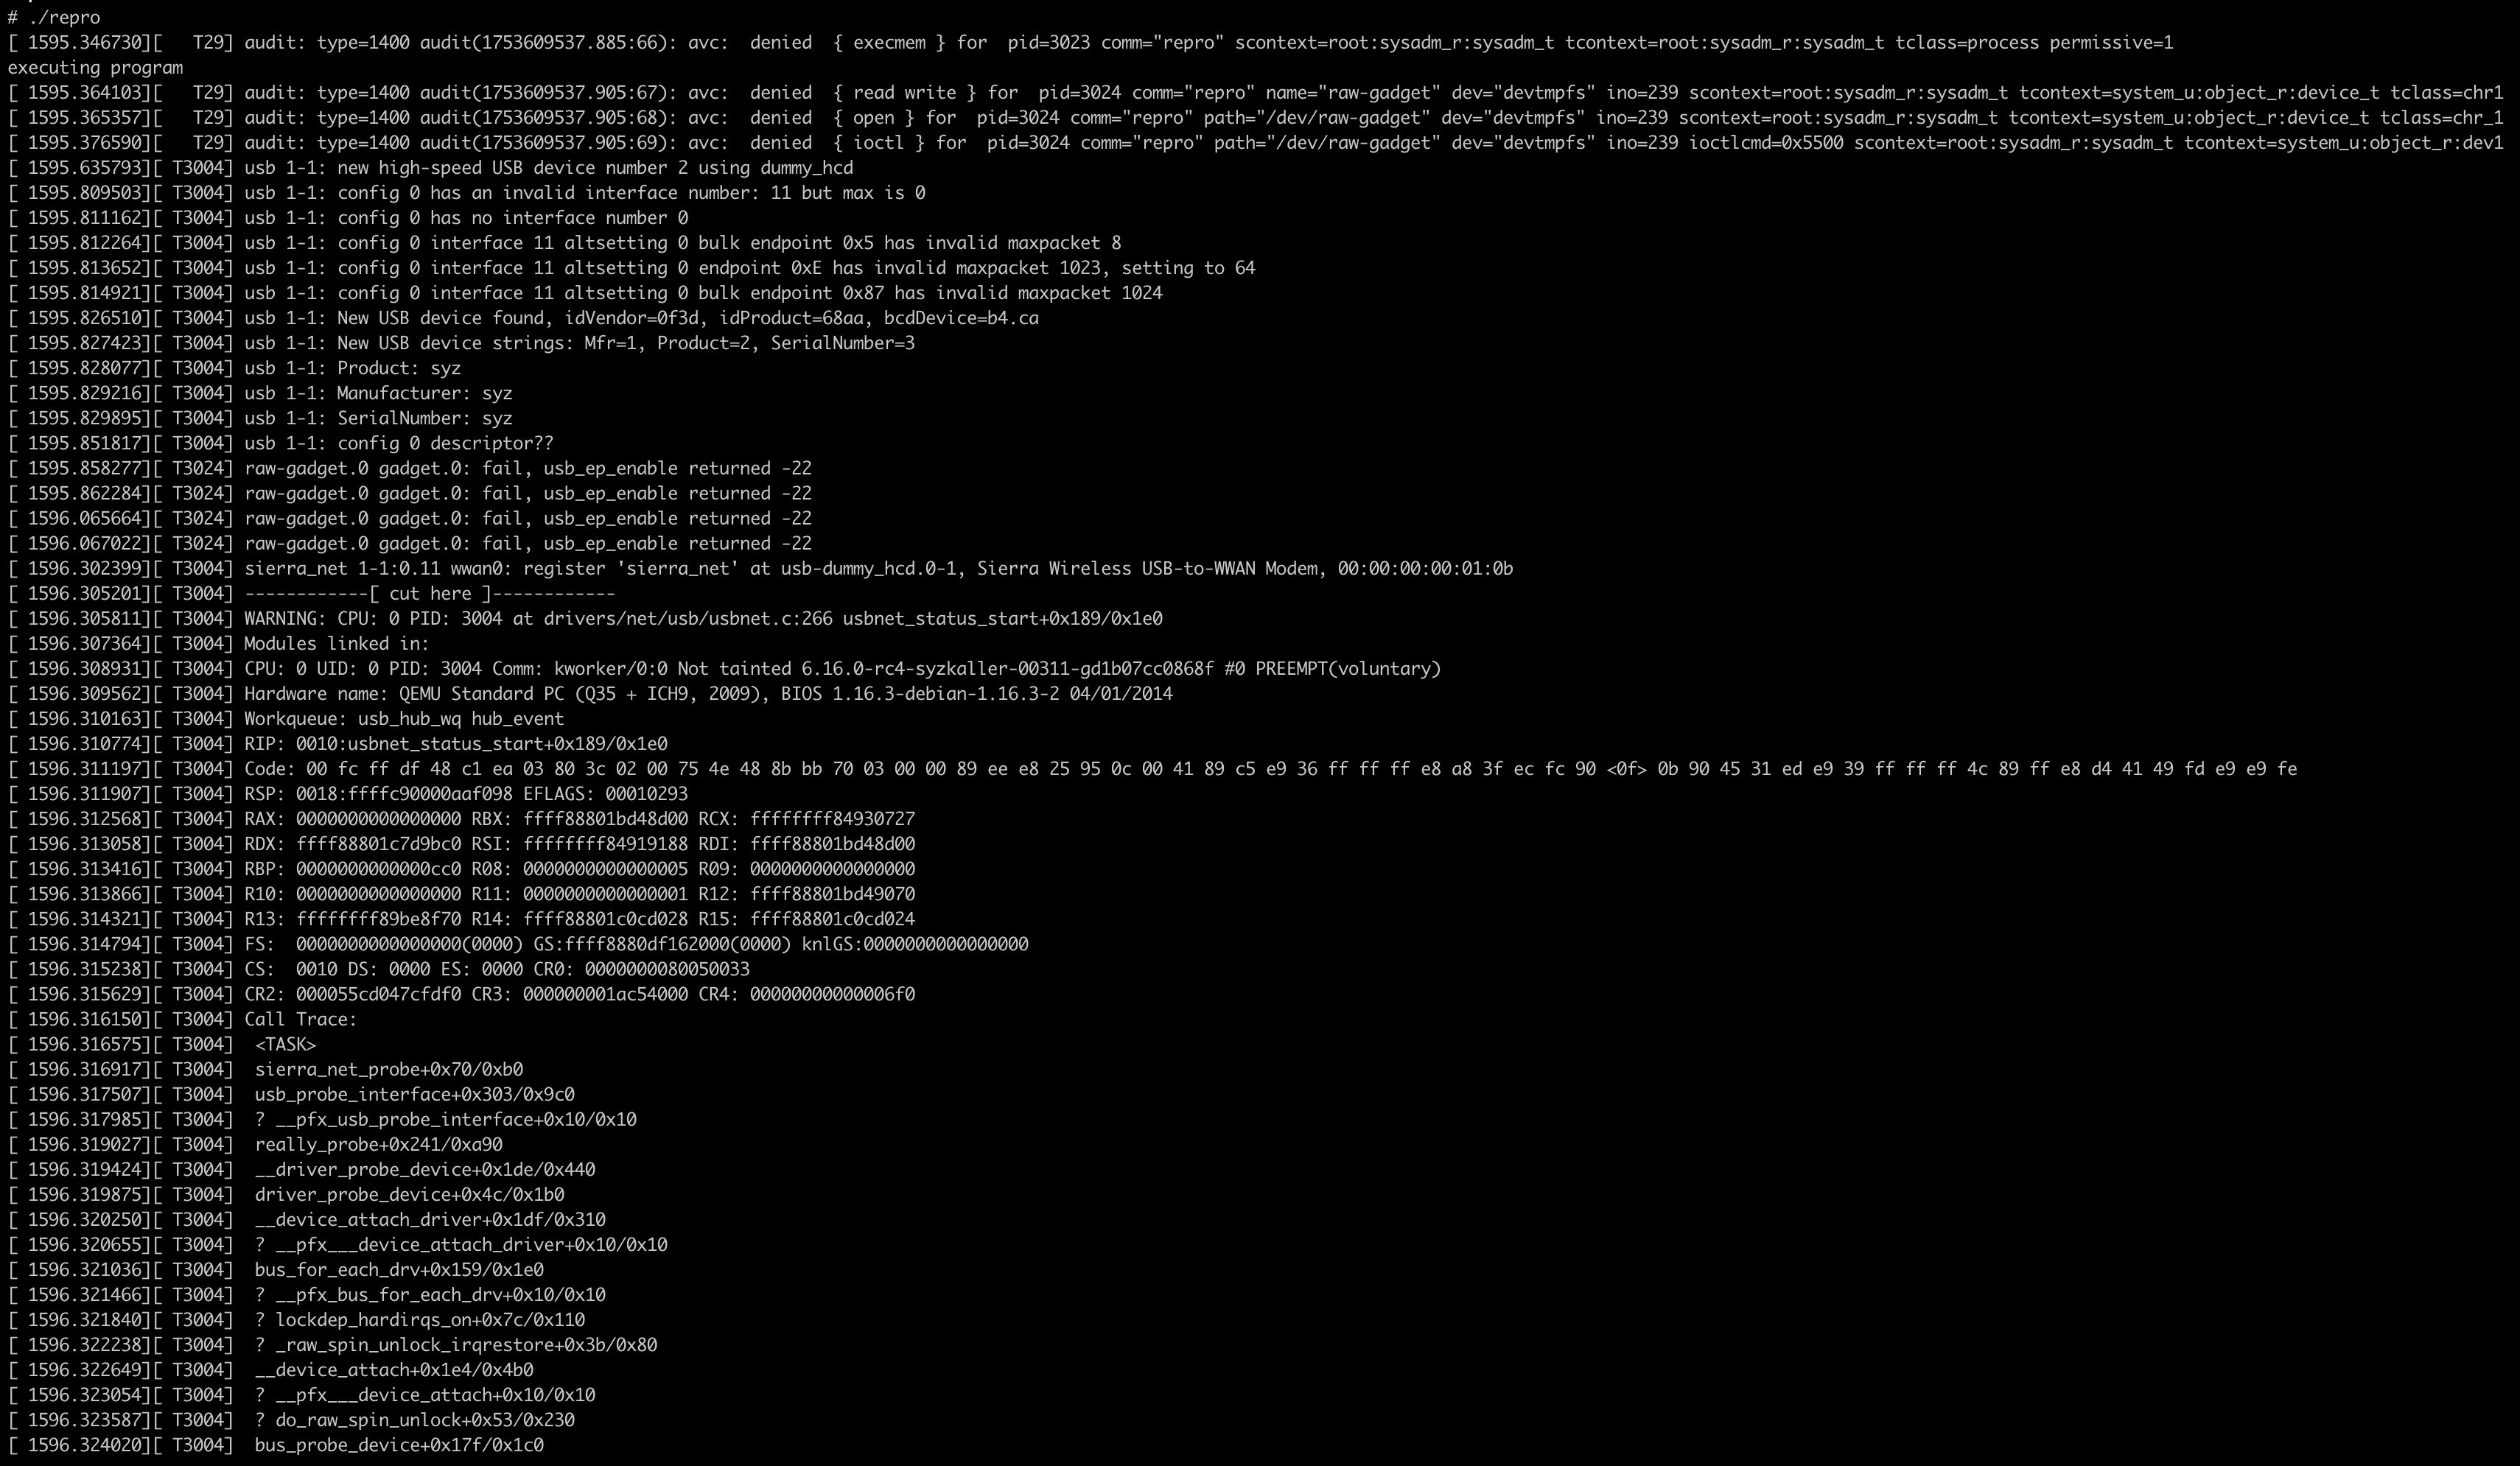
另外,也可以直接运行编译后的 C 程序:
1
2
| gcc -static -O2 -o repro repro.c
./repro
|
这种方式避开了 syzkaller 的运行时环境,通常在调试时更加简单。
由于我本地的ubuntu虚拟机是aarch64架构的,编译x86_64的目标程序需要交叉编译
1
2
| sudo apt update
sudo apt install gcc-x86-64-linux-gnu g++-x86-64-linux-gnu
|
随便写个c程序试试
1
2
3
4
5
| #include <stdio.h>
int main() {
printf("Hello from x86_64!\n");
return 0;
}
|
编译一下试试
1
2
3
4
5
6
7
8
| x86_64-linux-gnu-gcc -static hello.c -o hello_x86_64
file hello_x86_64
hello_x86_64: ELF 64-bit LSB executable, x86-64, version 1 (GNU/Linux), statically linked, BuildID[sha1]=829d19ddb1083607e695354fb0d8b47792aa80b6, for GNU/Linux 3.2.0, not stripped
# 也可以用clang编译
sudo apt install clang
clang --target=x86_64-linux-gnu hello.c -o hello_x86_64
|
看起来没问题,用qemu-user模式运行一下试试
1
2
| sudo apt install qemu-user
qemu-x86_64 ./hello_x86_64
|
测试没问题,用交叉编译的方式编译repro.c
1
2
3
4
5
6
7
| x86_64-linux-gnu-gcc -static -O2 -o repro repro.c
# 将编译产物拷贝到模拟器中
scp -P 10022 \
-o UserKnownHostsFile=/dev/null \
-o StrictHostKeyChecking=no \
~/syz/usbnet_status_start/repro \
root@127.0.0.1:/root/
|

Step Five: Build the Matching Kernel Locally
 1
 2
 3
 4
 5
 6
 7
 8
 9
10
11
12
13
14
15
| # syzbot报告问题的邮件中:git tree: https://git.kernel.org/pub/scm/linux/kernel/git/gregkh/usb.git usb-testing
git clone https://git.kernel.org/pub/scm/linux/kernel/git/gregkh/usb.git usb-testing
cd usb-testing
# syzbot报告问题的邮件中 HEAD commit: d1b07cc0868f arm64: dts: s32g: Add USB device tree informa..
git checkout d1b07cc0868f
# 先安装编译内核必要的依赖
sudo apt install libelf-dev libdw-dev
cp ~/syz/usbnet_status_start/.config .
make ARCH=x86_64 CROSS_COMPILE=x86_64-linux-gnu- olddefconfig
make ARCH=x86_64 CROSS_COMPILE=x86_64-linux-gnu- -j$(nproc)
# 编译报错的时候也可以用以下命令保存更多的编译日志方便排错
make V=1 ARCH=x86_64 CROSS_COMPILE=x86_64-linux-gnu- -j$(nproc) 2>&1 | tee build.log
|
Step Six: Run the Reproducer on the Locally Built Kernel
 1
 2
 3
 4
 5
 6
 7
 8
 9
10
11
| qemu-system-x86_64 \
-m 2048 \
-smp 2 \
-machine q35 \
-cpu qemu64 \
-kernel ~/usb-testing/arch/x86_64/boot/bzImage \
-append "root=/dev/sda1 console=ttyS0" \
-drive file=disk-d1b07cc0.raw,format=raw,snapshot=on \
-nographic \
-netdev user,id=net0,hostfwd=tcp::10022-:22 \
-device e1000,netdev=net0
|
拷贝编译后的复现程序repro
1
2
3
4
5
| scp -P 10022
-o UserKnownHostsFile=/dev/null
-o StrictHostKeyChecking=no
~/syz/usbnet_status_start/repro
root@127.0.0.1:/root/
|
使用复现器
拷贝复现器
1
2
3
4
5
6
7
| scp -P 10022 \
-o UserKnownHostsFile=/dev/null \
-o StrictHostKeyChecking=no \
~/syz/usbnet_status_start//assets/syz-execprog \
~/syz/usbnet_status_start/assets/syz-executor \
~/syz/usbnet_status_start/assets/repro.syz \
root@127.0.0.1:/root/
|
执行复现器
1
2
3
4
5
| ssh -p 10022 \
-o UserKnownHostsFile=/dev/null \
-o StrictHostKeyChecking=no \
root@127.0.0.1 \
'./syz-execprog -enable=all -repeat=0 -procs=6 ./repro.syz'
|
Step Seven: Apply the Patch and Rebuild
尝试下载并应用以下patch
1
2
3
4
5
6
7
8
9
10
11
12
13
14
15
16
17
18
19
20
21
22
23
24
25
26
27
28
29
30
31
32
33
34
| # 下载patch
wget -O patch.diff https://git.kernel.org/pub/scm/linux/kernel/git/torvalds/linux.git/patch/\?id\=4c4ca3c46167518f8534ed70f6e3b4bf86c4d158
# 应用patch
cd ~/usb-testing
git am ~/syz/usbnet_status_start/patch.diff
# 编译内核
cp ~/syz/usbnet_status_start/.config .
make ARCH=x86_64 CROSS_COMPILE=x86_64-linux-gnu- olddefconfig
make V=1 ARCH=x86_64 CROSS_COMPILE=x86_64-linux-gnu- -j$(nproc) 2>&1 | tee build.log
# 启动模拟器
qemu-system-x86_64 \
  -m 2048 \
  -smp 2 \
  -machine q35 \
  -cpu qemu64 \
  -kernel ~/usb-testing/arch/x86_64/boot/bzImage \
  -append "root=/dev/sda1 console=ttyS0" \
  -drive file=disk-d1b07cc0.raw,format=raw,snapshot=on \
  -nographic \
  -netdev user,id=net0,hostfwd=tcp::10022-:22 \
  -device e1000,netdev=net0
# 拷贝复现程序
scp -P 10022 \
-o UserKnownHostsFile=/dev/null \
-o StrictHostKeyChecking=no \
~/syz/usbnet_status_start/repro \
root@127.0.0.1:/root/
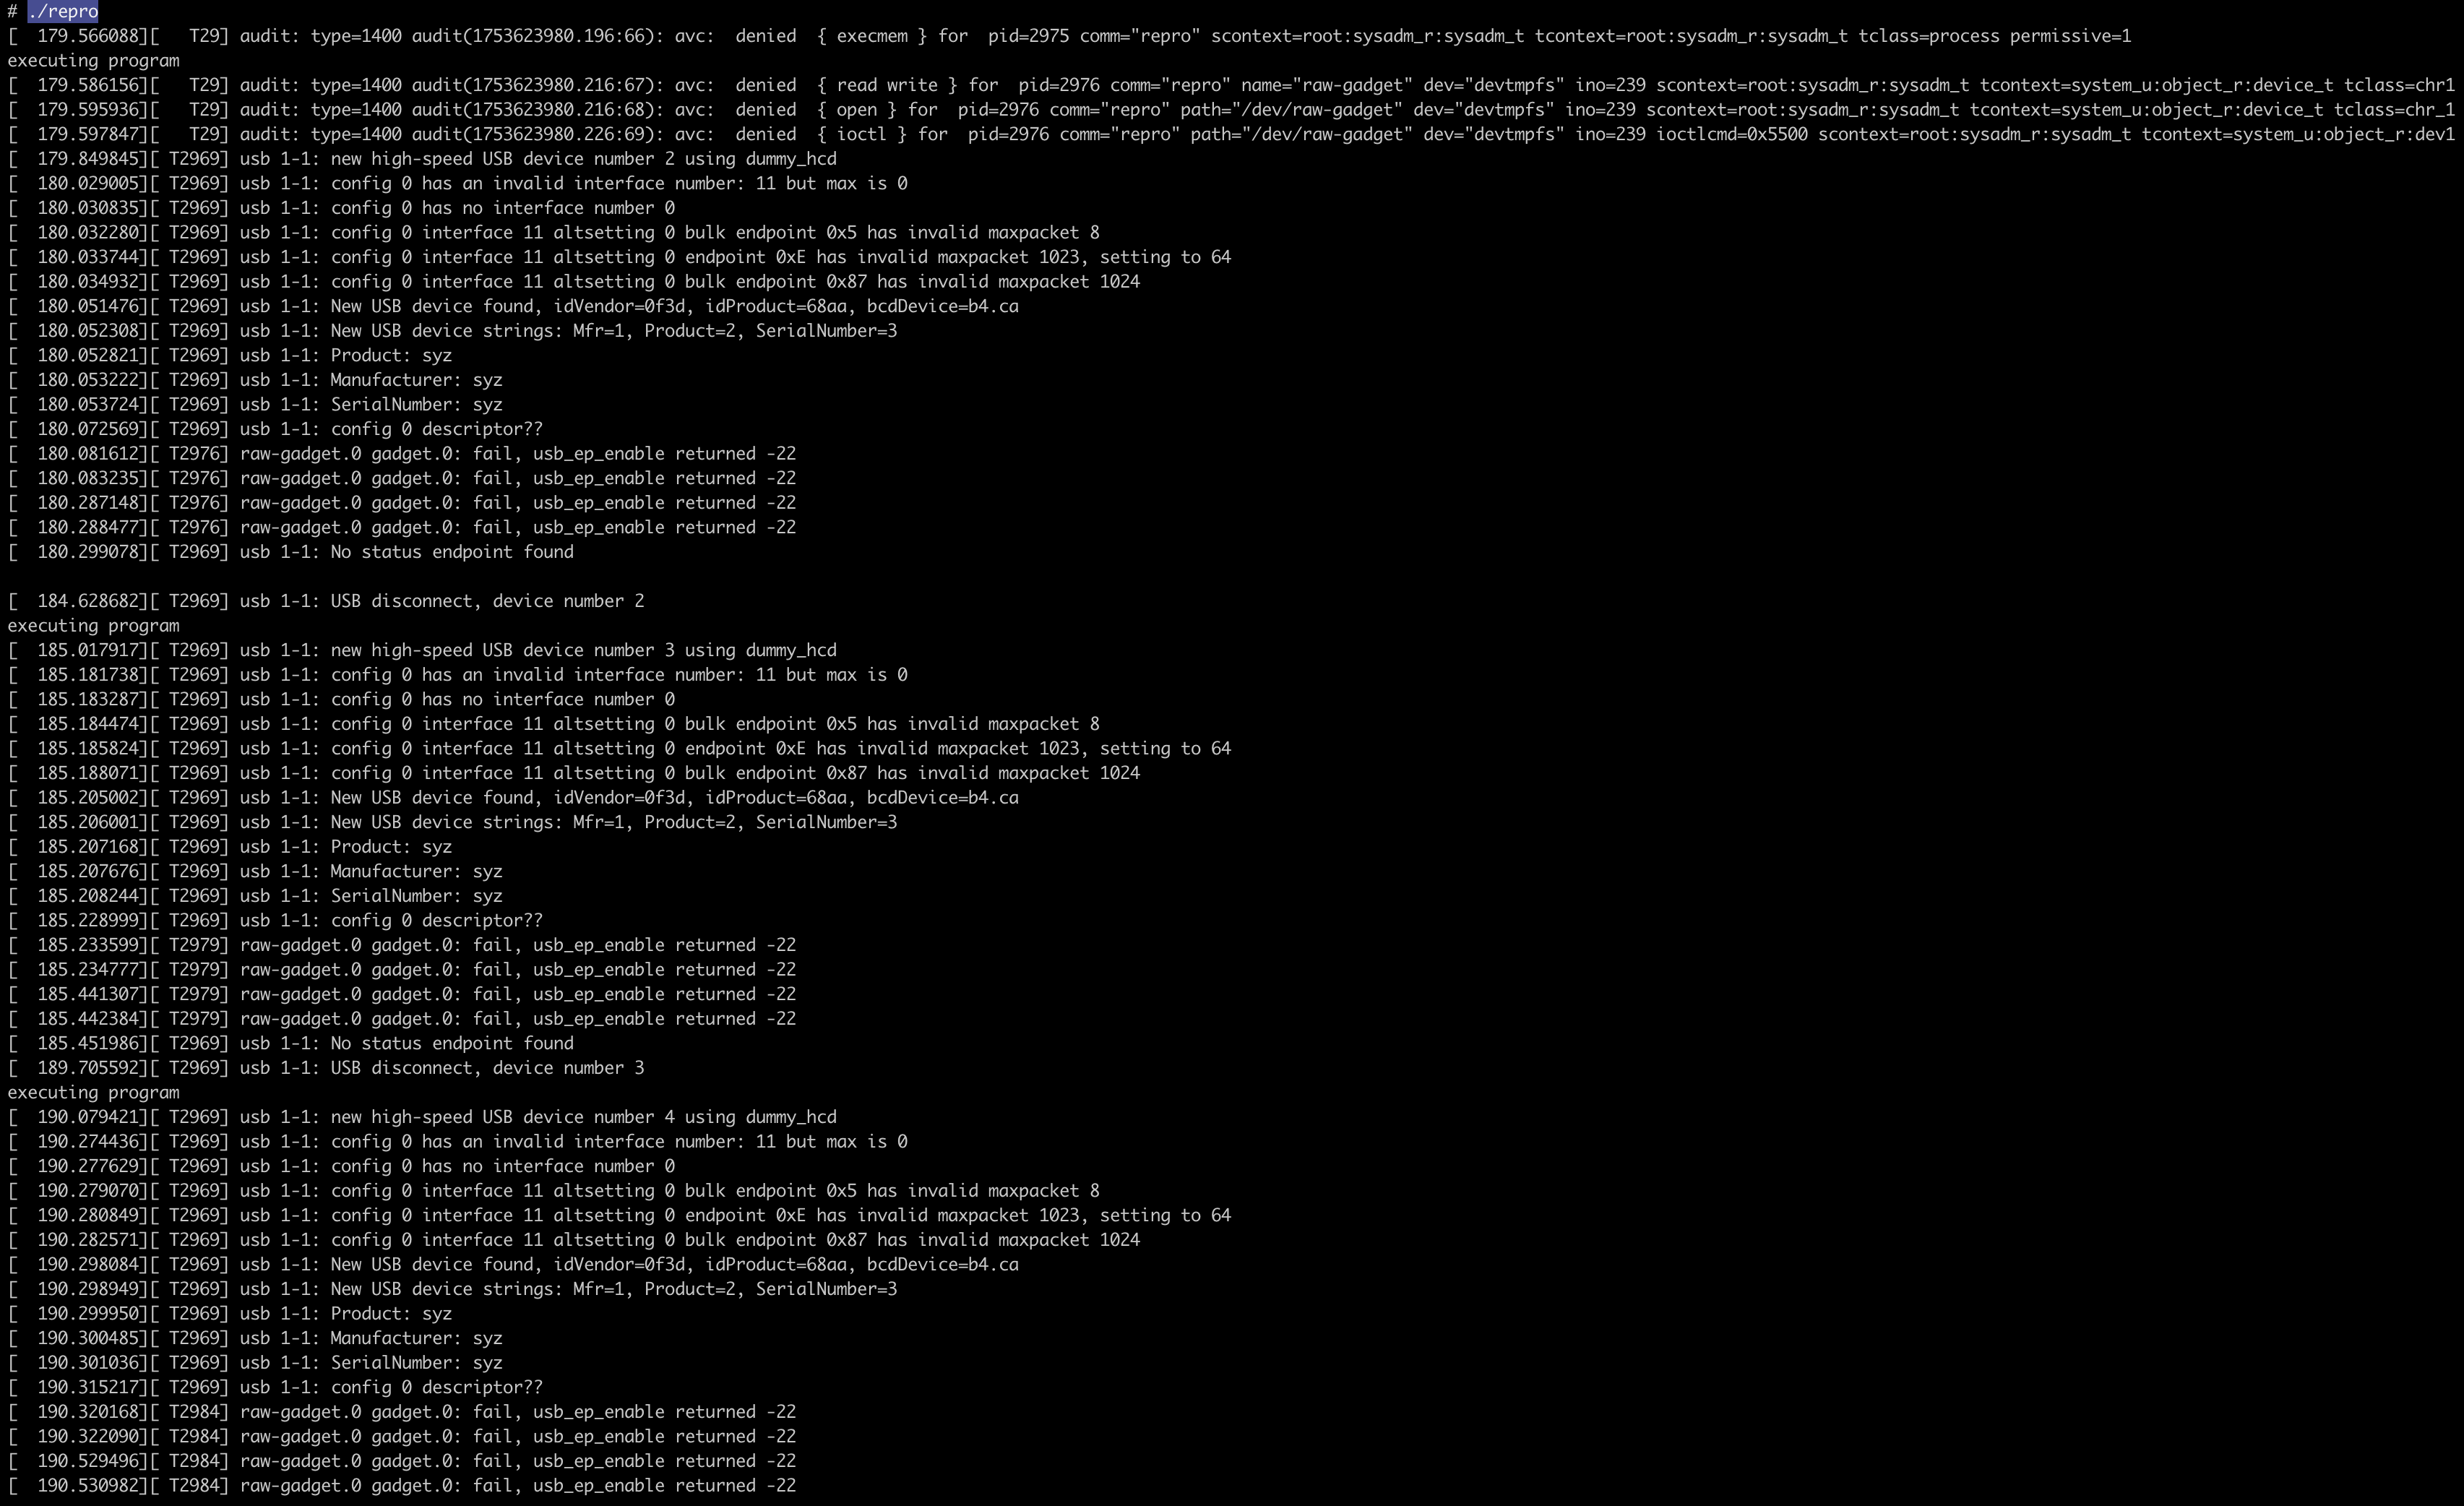
# 执行复现程序
./repro
|
不会再出现内核崩溃日志:
总结
本文主要根据Moon Hee Lee的Proof by Execution: Reproducing syzbot Bugs in a Local Kernel尝试复现syzbot发现的bug,并应用上游patch解决对应的问题。熟悉整个流程,为以后跟进上游bugfix做基础准备。