hugo-jane主题调整正文部分的宽度
以前的blog正文页面左右空白太多了,正文部分显示内容太少,一行内显示不了多少内容,需要频繁换行很不方便,因此想着自己修改一下主题的样式布局,本文记录折腾过程。
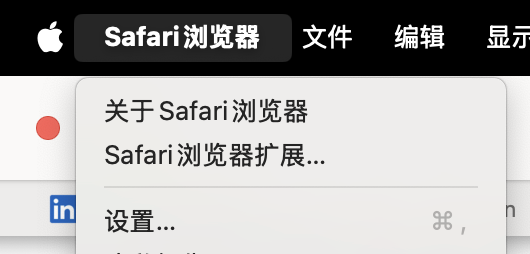
Safari浏览器开启“开发者模式” Chrome浏览器可以直接按F12快速进入开发者模式,然后可以方便的找到需要修改的样式是哪一个。Safari浏览器需要单独开启。
Step 1 : 点击屏幕左上角的 Safari浏览器 → 设置
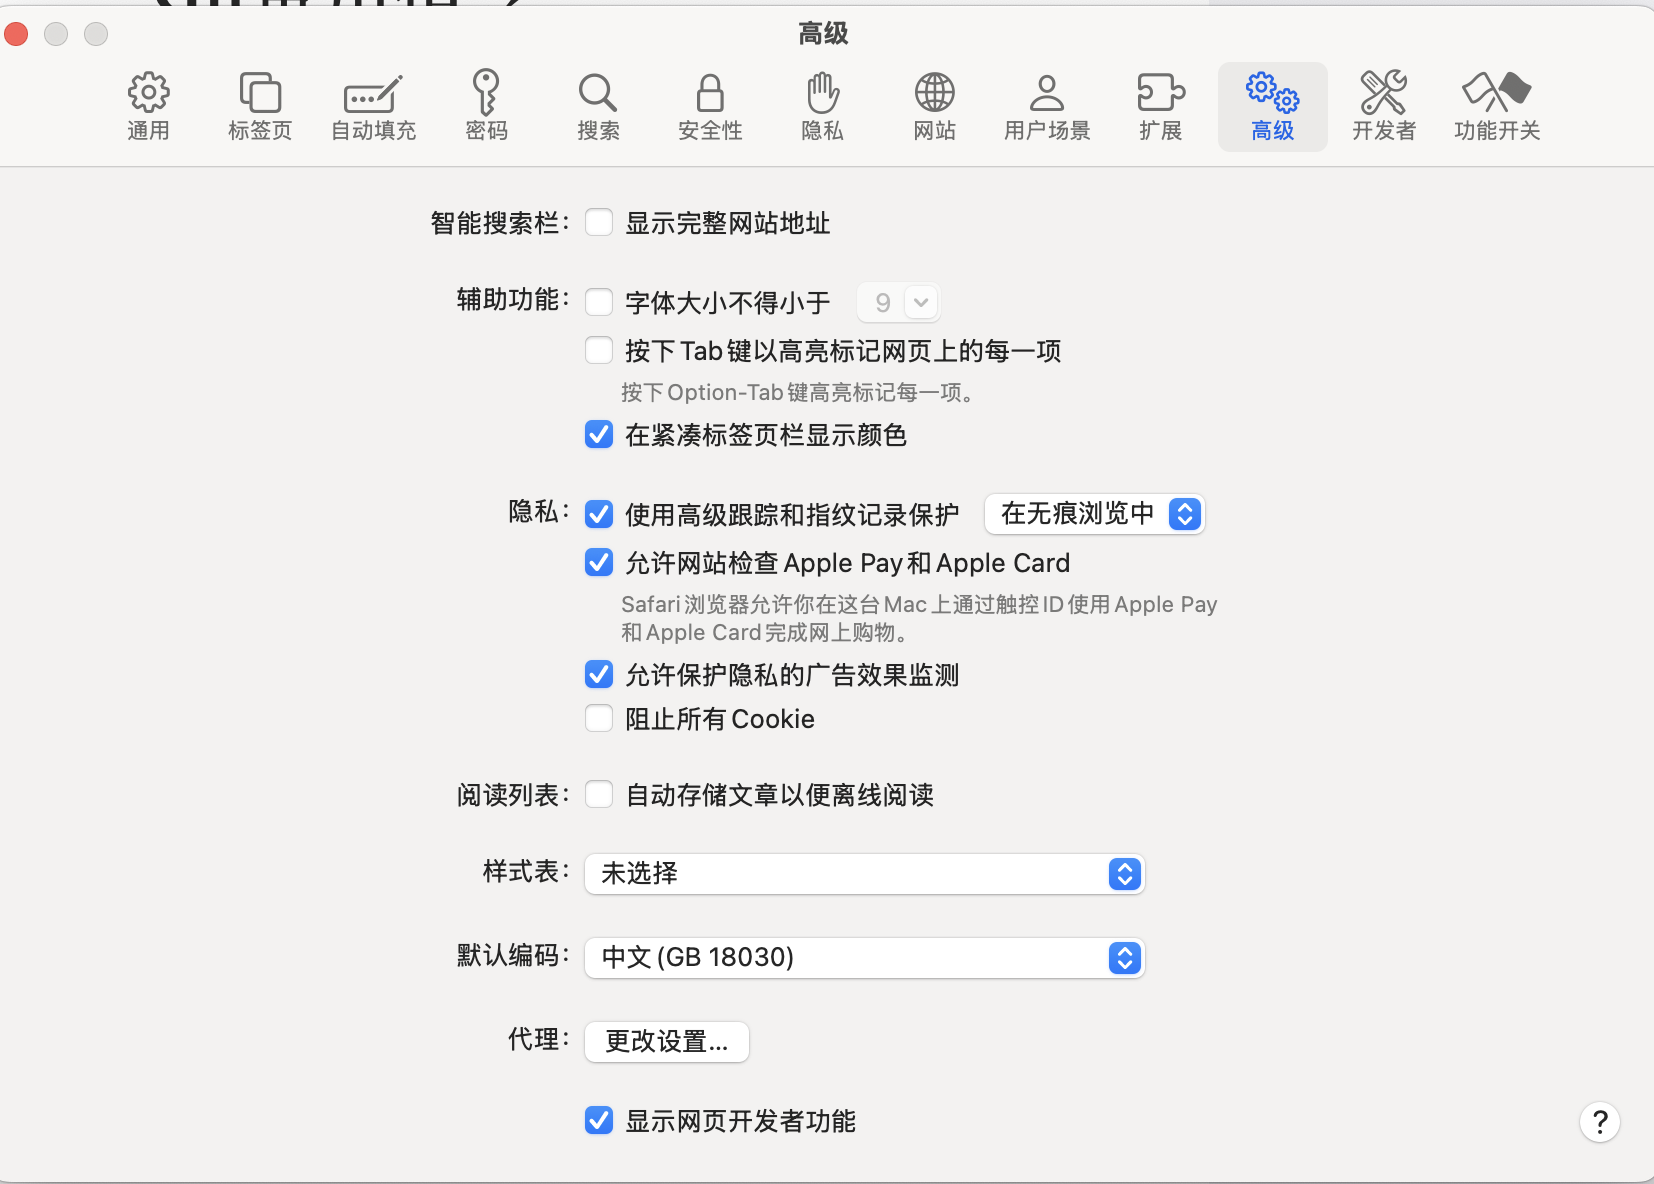
Step 2 : 高级 → 勾选最下方的显示网页开发者功能
Step 3 : Command + Option + i
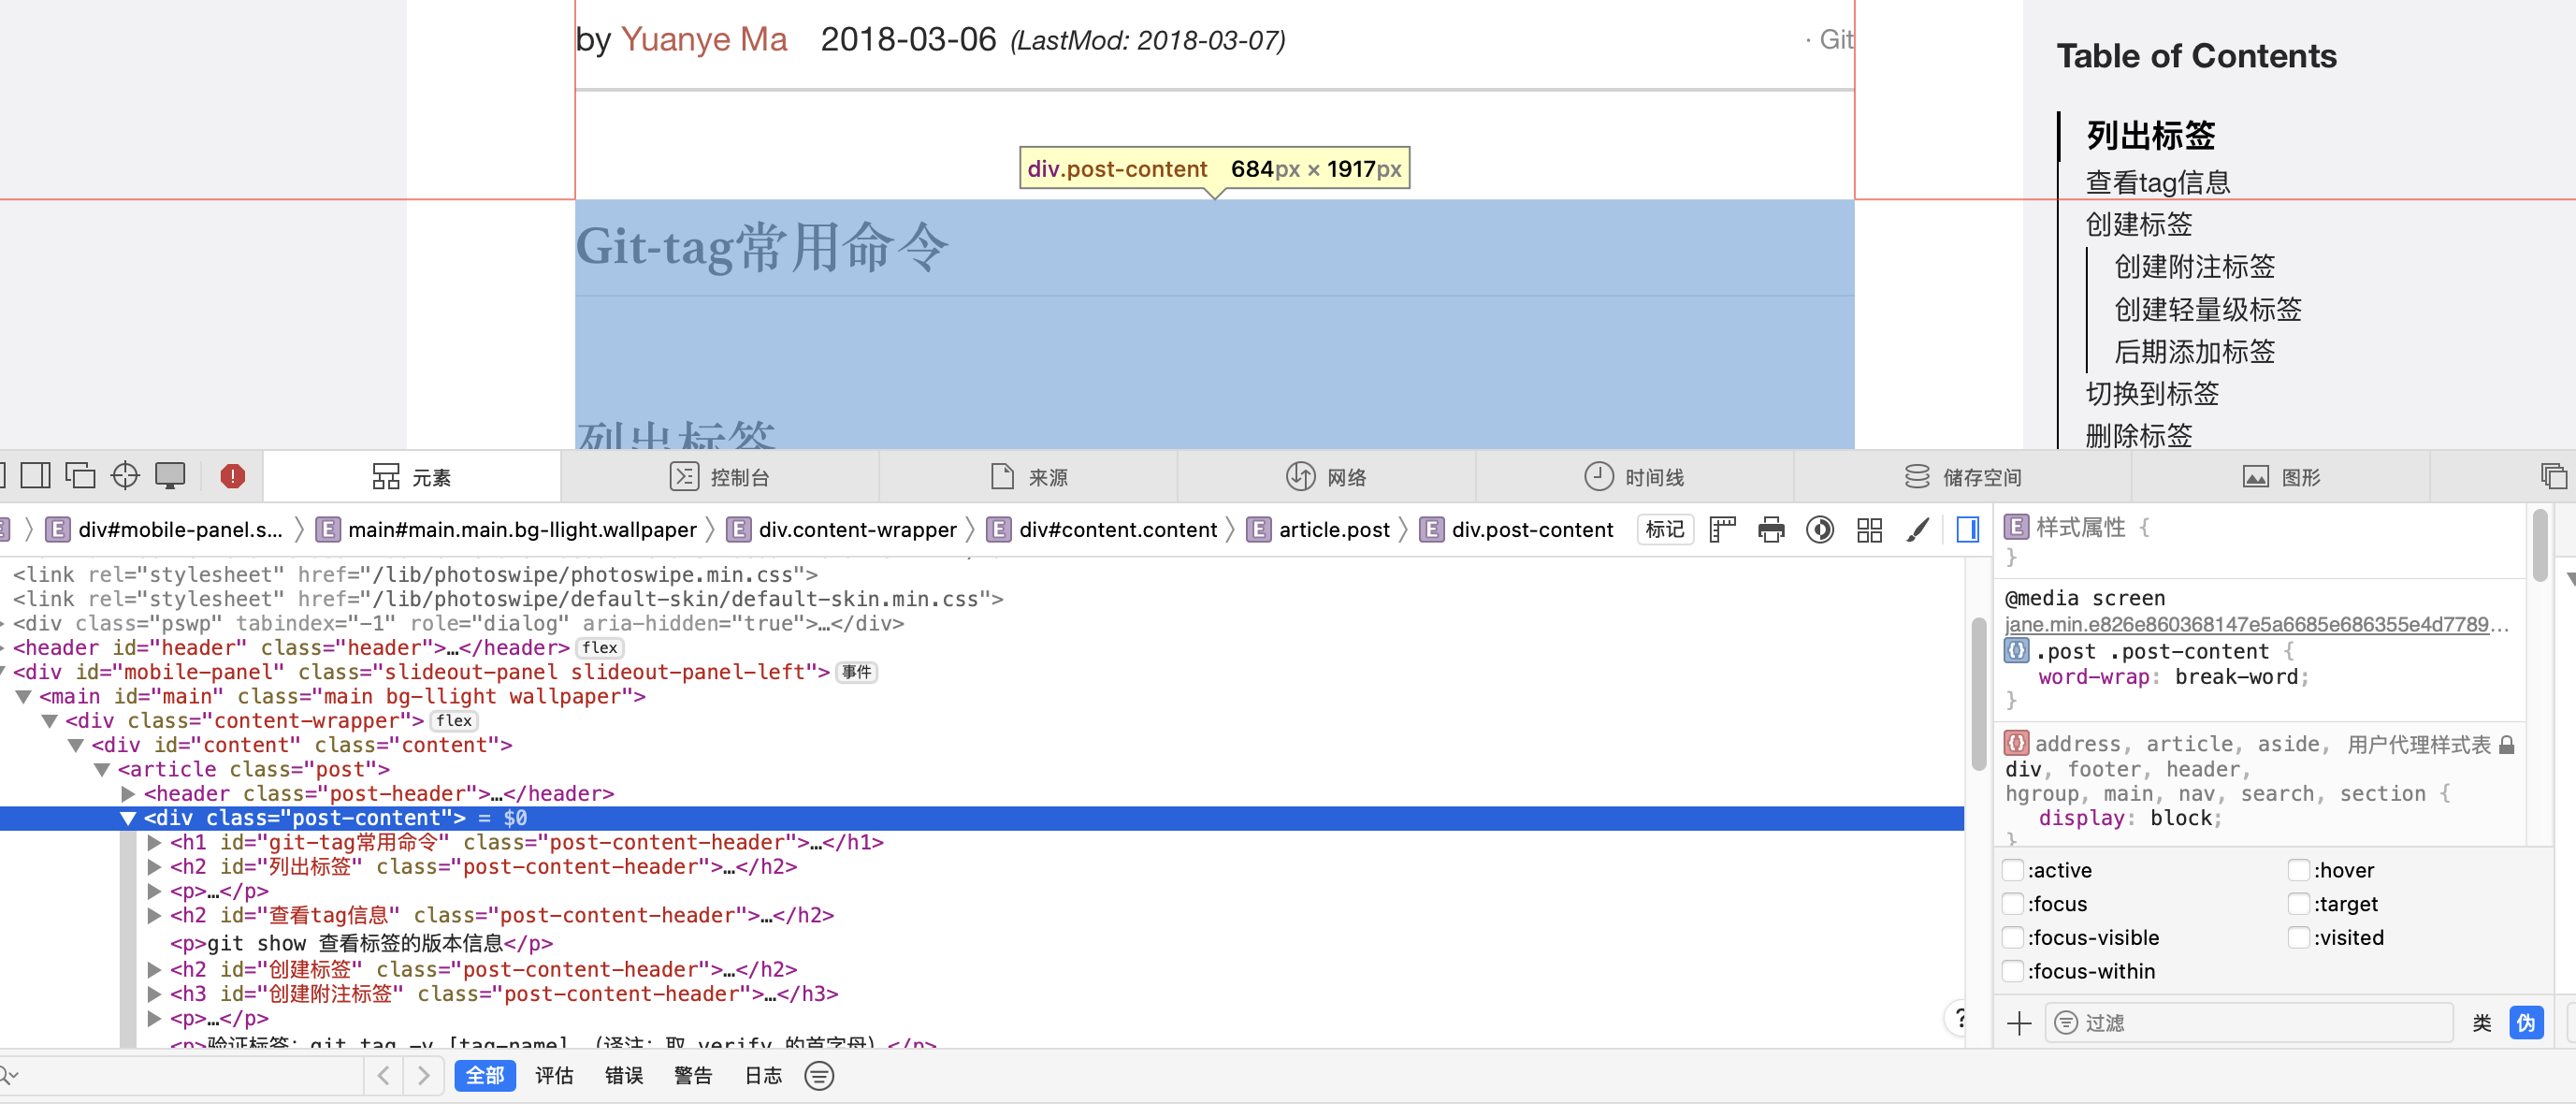
定位class 点击开发者模式左上角的准星图标,鼠标点击对应区域,如下图:正文的class是 post-content
在主题文件中搜索发现其定义在
1
./assets/sass/_partial/_post/_content.scss:5:.post-content {
查看_content.scss文件发现其并没有定义宽度相关的内容,继续找其父容器:post, 查看assets/sass/的目录结构,很容易的发现规律,post的class定义在assets/sass/_partial/_post.scss
发现其定义了width:38em,可以直接将其改一下试试。
 1
 2
 3
 4
 5
 6
 7
 8
 9
10
11
.post {
// optimal line length for body text is 50–60 characters per line
// [ Readability: The Optimal Line Length – Articles – Baymard Institute]( https://baymard.com/blog/line-length-readability)
width: 38em;
max-width: 38em;
padding: 3em 5em;
margin: 0 auto;
margin-bottom: 3em;
background-color: #fff;
// ......
}
💡38em 中的 em 是一种 相对单位 ,用于 CSS 中表示长度。它的含义依赖于元素的 字体大小(font-size) ,1em 表示 当前元素的字体大小 。如果元素的 font-size 是 16px,则 1em = 16px。
比如将其改成68em
然后hugo server -D 并刷新页面试试看有没有效果,确实生效了。
修改正文宽度 为了不破坏原有的文件,通过customCSS的方式override原有配置。
1
2
3
4
5
6
7
vim themes/jane/assets/sass/_custom/_custom.scss

# 写入以下内容
  .post {
    width : 50em;
    max-width: 50em;
  }
然后修改themes/jane/assets/sass/jane.scss 将_custom放到最后,防止被覆盖掉
 1
 2
 3
 4
 5
 6
 7
 8
 9
10
-@import "_custom/custom";
@import "_common/normalize";
@@ -19,3 +18,5 @@
@import "_partial/author_info";
@import "_partial/search";
+
+@import "_custom/custom";
之后将修改push到github就可以自动部署了。